Australian War Memorial Logo
Search

Donate Today

  • Collection Open Information Close Information
    • Official Histories & Unit Diaries
    • Understanding the Collection
    • Research at the Memorial
    • Donating to the Collection
    • National Collection Loans
    • Projects
  • People
  • Visit
  • Commemorate Open Information Close Information
    • Last Post Ceremony
    • Honour Rolls
    • Anzac Day
    • Remembrance Day
    • Customs & Ceremony
    • Speeches
  • Learn Open Information Close Information
    • Schools & Teachers
    • Memorial Articles
    • Encyclopedia
    • Understanding Military Structure
    • Podcasts
    • Glossary
    • Magazine
  • Get Involved Open Information Close Information
    • Donations & Bequests
    • Corporate Partnership
    • Employment Opportunities
    • Volunteer at the Memorial
    • Friends of the Memorial
    • eMemorial Newsletter
    • Grants, Scholarships & Residencies
    • Research Papers
  • Shop Open Information Close Information
    • Memorial Shop
    • Images, film and sound
    • Lone Pine Seedlings

Breadcrumb

  1. Home
  2. Visit
  3. Exhibitions
  4. Out in the Cold: Australia's involvement in t...
  5. Out in the Cold: Australia's involvement in t...
  6. Out in the Cold: Australia's involvement in t...

Main navigation

  • Other Exhibitions
  • Current Exhibitions
  • Past Exhibitions
  • Touring Exhibitions
  • Online Exhibitions

Out in the Cold: Australia's involvement in the Korean War - Samichon River "The Hook"

  • Home
  • Timeline
  • Origins
  • Australians in Korea
  • Australian Operations
  • Weapons of War
  • Faces of War
  • Armistice and Aftermath
  • Glossary

 
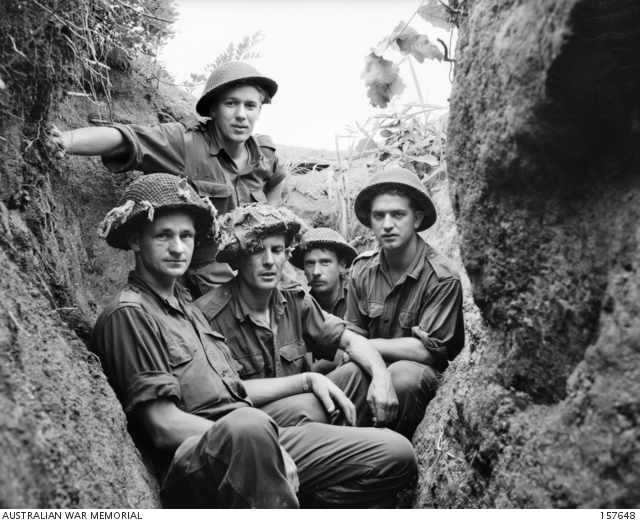
Samichon River "The Hook" 24-26 July 1953

"The memories of bad times in the line were beginning to fade, and everyone was getting impatient for action. 'When are we going in the line again?' At last the order came though, 'We're going on an important feature further along in the Western Front.' We were to relieve the Poms on 'The Hook'."
 

Private Harry Kammerman, 2 RAR

The Hook was a vulnerable but heavily defended section of the UN frontline, that protected other UN positions in the Samichon valley. Here, Australian soldiers took part in their last engagement of the war; the armistice declared only one day later. Positioned at The Hook were the 2nd Battalion, Royal Australian Regiment (2 RAR) and the 3rd Battalion, Royal Australian Regiment (3 RAR), as the forward troops of the 1st Commonwealth Division. Other vital positions to the left of the Australians were held by the 7th Regiment of the US Marines.

On 24 July, Chinese forces launched their final attack of the war. Probing 2 RAR's position with small infantry parties after dark, the Chinese later subjected it to extended to a heavy night bombardment, followed by waves of assaulting infantry. The alternating bombardment and infantry assault continued through the night, but the Chinese were unable to penetrate the Australian positions.

Throughout 25 July, the Australian troops were shelled, and endured heavy mortar and artillery fire that night. The American position, to the left of the Australians on The Hook, was now under an infantry attack. With fire support from the Australian positions, the Americans managed to hold off the Chinese infantry, but continued to receive heavy bombardment. By the early hours of the next day, the Chinese had given up their attack.

Five Australian soldiers were killed; 24 were wounded. The next day, the armistice was signed at Panmunjom. The action at The Hook was one of the major engagements of the stalemate period - and having just fought a hard action for three days, it was difficult for Australian troops to believe that the war was finally over.

Collection Item C280187

Accession Number: 157648

Troops of C Company, 2 RAR, in trenches on The Hook,
June 1953.

Collection Item C280272

Accession Number: 157687

Troops of 2 RAR move from The Hook to the Demilitarised Zone, 72 hours after
the cease-fire.

Australian Battles

  • 3rd Battalion, Royal Australian Regiment
    September 1950 - February 1954
  • Yongju/The Apple Orchard
    October 22, 1950
  • Kujin/ Broken Bridge
    October 25-26, 1950
  • Chongju
    October 29, 1950
  • Pakchon
    November 5, 1950
  • Kapyong
    April 23-24, 1951
  • Maryang San/Operation Commando
    October 2-8, 1951
  • 1st Battalion, Royal Australian Regiment
    March 1952 - Sept 1953
  • Operation Fauna
    Dec 10-11, 1952
  • 2nd Battalion, Royal Australian Regiment
    March 1953 - Sept 1954
  • Samichon/The Hook
    July 24-26, 1953
  • The Royal Australian Navy
  • Operation Han
    July-Sept, 1952

Last updated: 19 May 2021

1 The Donations and bequests

Donations & Bequests

Your generous donation will be used to ensure the memory of our Defence Forces and what they have done for us, and what they continue to do for our freedom remains – today and into the future.

Find out more
2 Visit Transcribe.awm.gov.au

Transcribe

Help preserve Australia's history by transcribing records from the National Collection. Enhance accessibility and discoverability for all Australians.

Find out more
The placesofpride

Places of Pride

Places of Pride, the National Register of War Memorials, is a new initiative designed to record the locations and photographs of every publicly accessible memorial across Australia.

Find out more
Visit the Australian War Memorial

Visit the Australian War Memorial

The Australian War Memorial is open for visitors as we work to expand our galleries. Entry is free and tickets are not required.

Find out more
Canberra Highlands in Grayscale

ACKNOWLEDGEMENT OF
TRADITIONAL CUSTODIANS

The Australian War Memorial acknowledges the traditional custodians of country throughout Australia. We recognise their continuing connection to land, sea and waters. We pay our respects to elders past and present.
Location map of The Australian War Memorial
The Australian War Memorial building

The Australian War Memorial

Fairbairn Avenue
Campbell ACT 2612
Australia
View on Google Maps (opens in new window)
Google Map data ©2025 Google
Australian War Memorial Logo
  • Go to AWM Facebook
  • Go to AWM Trip Advisor
  • Go to AWM Instagram
  • Go to AWM Youtube

Footer

  • About
  • Contact
  • Venue Hire
  • Media
  • WM Magazine
  • Donate Today

The Australian War Memorial

Fairbairn Avenue

Campbell ACT 2612

Australia


Opening Hours

10 am to 4 pm daily (except Christmas Day)


In preparation for the daily Last Post Ceremony,

galleries are progressively closed from 3:40 pm.


Public entrance via Fairbairn Avenue, Campbell ACT 2612

Sign up to our newsletter

Subscribe

Legal

  • Copyright
  • Disclaimer
  • Privacy Policy
  • Accessibility
  • Freedom of information

Copyright 2025 Australian War Memorial, Canberra. All rights reserved