75th Anniversary AIF Malaya first contact with Japanese
Gemencheh Bridge, 14 January 1942
This blog recalls the 75th anniversary of the day in 1942 when members of B Coy, 2/30th Battalion, seized an opportunity as the first Australian ground force to clash with the Japanese and blow a vital bridge at Gemencheh, in the state of Negri Sembilan, Malaya.
By allowing a small element of Japanese to cross over and continue east toward the town of Gemas, the Australians intended to bring to bear the strength of the main force battalion, with support from 2/15th Field Regiment (Artillery) and 2/4th Anti-Tank Regiment. The Japanese, trapped on the hostile side, were to be destroyed while artillery fire rained down on the bulk of the enemy halted at the ambush site.
The action was designed to check the Japanese advancing down the western side of the Malay Peninsula and allow for the redeployment of the allied forces and a counter attack to regain the initiative.

On 10 January 1942, 2/30th Battalion War Diary received orders for the forthcoming contact. AWM52 8/3/30/8 Jan-Feb 1942 RCDIG1027059 [cropped].
As described in the Australian Army Campaign Series – Malaya, the ambush site was centred on a small wooden bridge where the road from Tampin crossed the Gemencheh River, 12km west of Gemas. Once over the bridge, it crossed 30 metres of flat scrub before entering three cuttings. These cuttings ran for 40 metres and rose like walls about four metres above the road, covered in thick, hanging vegetation.
The Australians occupied these positions in the late afternoon of 13 January 1942. At 1600hrs the following day, the bridge along with a considerable number of Japanese would be destroyed.
Private John Korsch, C Coy, 2/30th Battalion, recorded how the companies of 2/30 Battalion drew lots for the staging of the ambush after the bridge was blown. “A number of Japanese had been allowed to cross and B Coy, concealed in scrub either side of the cutting, inflicted heavy losses on the enemy”.
Captain Jack Duffy, Officer Commanding B Coy, had deployed his troops atop the cuttings and below road level and maximised the effectiveness of his Bren machine guns by covering the approaches. On 5 March 1942, Duffy was gazetted a Military Cross for leadership during the action.
The engagement lasted no more than 20 minutes. The Japanese losses were due to small arms, hand grenades, machine guns – and surprise. The artillery strike, intended to destroy the enemy massed at the river, never came.
Private Jack ‘Kiwi’ Bland was a member of B Coy escaping through the jungle on orders to rejoin the main battalion positions outside Gemas. The following is an abbreviated account of what happened next :
“The party of B Coy…were astride the top of a hill, on their way back to battalion lines. Japs had been encountered and engaged by the forward platoon. A machine gun opened up…and bullets were chopping leaves overhead. The Japs were now coming up on their right rear – those forward had fallen back – and our party now had high hopes of catching up with the company. After this firing, more shots broke out on the left and front rear. They decided it was impossible to go forward and when Bland said that he knew the railway line was on their right, they changed direction to the right.”
The ambush cost B Coy nine wounded and one killed on the journey back to Gemas.

By 2335 hours on the 14th, the 2/30th Battalion war diary recorded the enemy to be digging in at 58 ½ mile post. Australian troops at the main battalion positions to the east remained on alert all night. AWM52 8/3/30/9 Jan-Feb, Maps RCDIG1027060.
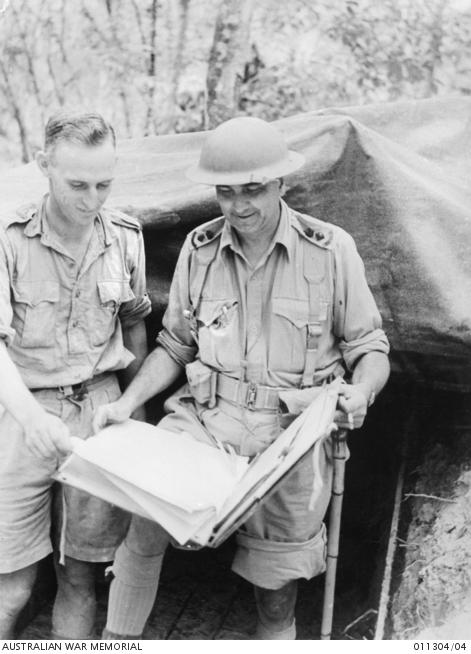
GEMAS, MALAYA. 1942. LIEUTENANT COLONEL FREDERICK G. "BLACK JACK" GALLEGHAN, COMMANDING OFFICER 2/30TH BATTALION (RIGHT), EXAMINING A MAP WITH SERGEANT HECKENDORF (LEFT), INTELLIGENCE SERGEANT, OUTSIDE THE BATTALION COMMAND POST.
The man responsible for undertaking the action was commanding officer of the 2/30th Battalion, Lieutenant Colonel Frederick (‘Black Jack’) Galleghan (pictured above with Staff Intelligence Sergeant Erwin Heckendorf).
Criticisms of Galleghan’s methods include forbidding the use of field radios for security reasons without a suitable back up plan. This policy resulted in command confusion when the intended artillery strike for devastating the enemy either side of the bridge was thwarted as Japanese scouts cut the telephone lines. Moreover, Galleghan refused to sanction a despatch rider to advise HQ that the trap had been sprung.
The battalion war diary records that Sgt Heckendorf (then L/Cpl in diary) set out at 0210hrs on the 15th in search of B Coy.
Recollecting his experiences with fellow veterans in 1983, Erwin ‘Curley’ Heckendorf said:
“B Coy got back before I did…yes, one platoon fought their way back, got back through the enemy, I did not get back ‘til Fort Rose [Estate – the rally point].
“B Coy did not go through the jungle, I don’t think, they must have come down along the railway. The O.M. [Old Man, that is, Lt Col Galleghan] didn’t know whether the rest of the company was alright or not. And they did not turn up until Fort Rose.
“I think Duffy himself himself came through unscathed – he didn’t meet any enemy.”
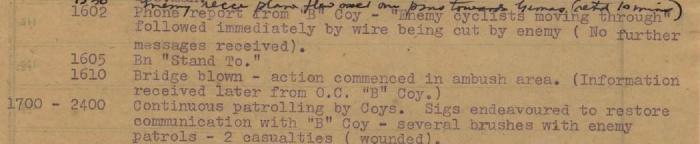
14 January 1942, 2/30th Battalion War Diary announcement of the action. AWM52 8/3/30/8 Jan-Feb 1842 RCDIG1027059 [cropped] .

GEMENCHEH, NEGRI SEMBILAN, MALAYA. 1945-09-25. THE BRIDGE (MIDDLE DISTANCE) OVER THE GEMENCHEH RIVER WHERE, ON THE 1942-01-14 MEMBERS OF THE 2/30TH AUSTRALIAN INFANTRY BATTALION SUPPORTED BY NO. 30 BATTERY, 2/15TH AUSTRALIAN FIELD REGIMENT AND THE 4TH AUSTRALIAN ANTI-TANK REGIMENT AMBUSHED AND KILLED SOME 600 JAPANESE SOLDIERS (57 MILE PEG.)
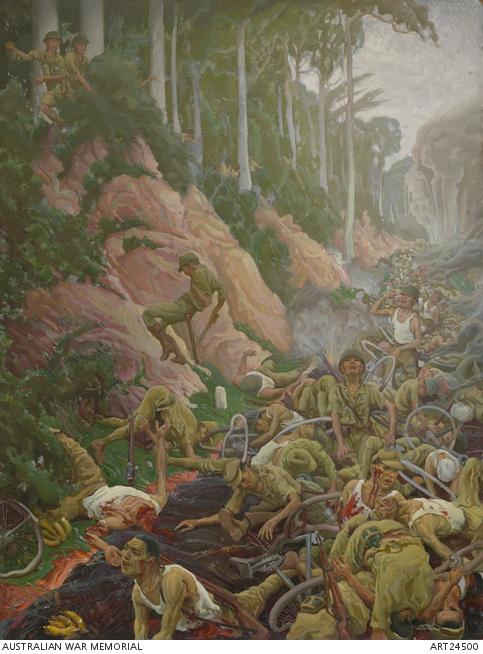
An ambush at the bridge over the Gemencheh River, beyond Gemas, in Singapore on 14 January 1942. (Griffin Murray, 1946).
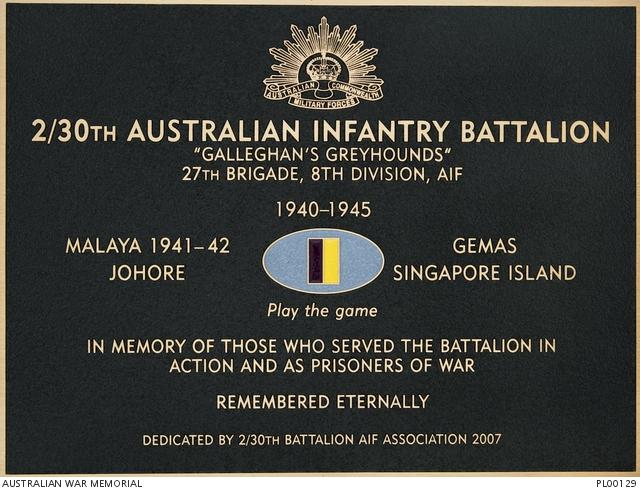
This plaque was dedicated on 20 March 2007 at a ceremony held at the Australian War Memorial.
According to Australian Army Campaign Series – Malaya, the Japanese were spared the artillery’s onslaught by poor Australian planning and lack of Galleghan’s resolve. The Japanese advance resumed within an hour and the bridge repaired in six, using timber from a nearby sawmill. By dawn on the 15th, tanks were across the Gemencheh and heading for the vicinity of 61 Mile Post - Gemas.
The Australian experience in Malaya during the Second World War is analysed by Dr Garth Pratten in the latest edition of the Memorial's ‘Wartime’ magazine. ‘Fighting for Time’ examines how ‘the Japanese driving charge proved too much for British and Commonwealth forces in the Malayan Campaign.’
Sources
- 2/30th Battalion War Diary, AWM52 8/3/30, Australian War Memorial
- Farrell, I & Pratten, G (2009) Australian Army Campaign Series - 5: Malaya, Army History Unit, Canberra
- Papers of NX46619 Pte John Korsch, PR00078, Australian War Memorial
- Papers of NX36791 Sgt Erwin Heckendorf, PR00686, Australian War Memorial
- Account of the 2/30th Battalion AIF, Malaya, early 1942 [Account of NX255556 Pte Jack Bland], F940.547252 A172, Australian War Memorial
- Wartime, Official Magazine of the Australian War Memorial, Issue 77, Summer 2017