Battle of Passchendaele (Third Ypres)
Overview
After mid-1917, and following mutinies in the over-strained French Army, the British Forces had to assume an even greater role in the war on the Western Front. For Field Marshal Sir Douglas Haig, the British commander-in-chief, this provided an opportunity to launch an offensive that he had long wanted. Attacking from Ypres in Belgium, he planned to drive the Germans from the surrounding dominant ridges and even hoped to reach the Belgian coast. Following on the success at Messines in June, he unleashed his great attack on 31 July 1917. Fighting went on, often in appalling weather and despite crippling losses, until November. Finally, with the army stuck in muddy fields churned up by the artillery fire, the bloody offensive came to an untidy close. Many would afterwards call this offensive, actually a series of battles, after the name of the village that had become the last objective – 'Passchendaele'.
Menin Road and Polygon Wood
The Australian infantry divisions joined the Third Battle of Ypres which had been going on since 31 July when they took part in the battle of Menin Road on 20 September 1917. Fortunately a change in the weather brought for them better fighting conditions. The side-by-side advance of the 1st and 2nd Australian Divisions took them up to the splintered remnants of Polygon Wood not far from Zonnebeke. The 4th and 5th Divisions then took over and, as part of the wider effort, they attacked on 26 September. In both cases the fighting was bloody. German concrete pillboxes often blocked the Australians' progress, and many men fell under shell and machine-gun fire. However with heavy artillery support the objectives were taken and enemy counter-attacks held off. These systematic step-by-step advances, staying within range of the supporting artillery, pushed the line forward by a few kilometres, but they were made at a heavy cost; in just over a week there were almost 11,000 Australian casualties.
Download Menin Road battle 1 map (PDF file)
Download Menin Road battle 2 map(PDF file)
Aerial and ground-level photographs taken of the Polygon Wood area. Note the difference in destruction between the first aerial photo (July) and the next two (September) when virtually every inch of the ground had been destroyed and badly cratered. The misery only increased as the landscape filled with water.
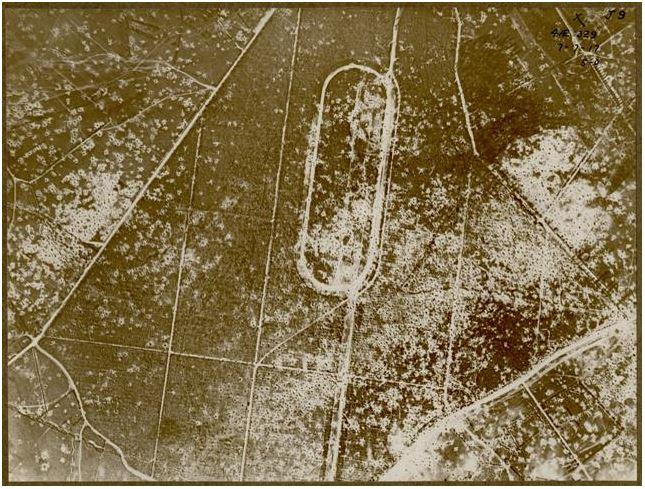
Aerial photo of Polygon Wood race track on 7 July 1917

An oblique angle aerial photo of Polygon Wood on 14 Sept 1917
It was on the Menin Road that I first noticed the condition (of) our men coming back. A couple passed us, going very slow. They were white and drawn. C.E.W. Bean.
Broodseinde and Passchendaele
The 1st, 2nd and 3rd Australian Divisions captured Broodseinde Ridge on 4 October 1917. It was a vital victory. But, then it began to rain. Five days later the 2nd Australian Division suffered heavily in a further attack in the mud. Finally, on 12 October, another attack, involving the 3rd Division assisted by the 4th, was made against the village of Passchendaele atop the main ridge. In the face of heavy fire, the men fought in the mire while struggling to keep up with their artillery barrages. Ground was taken but it could not be held. In wretched conditions, with casualties mounting at an appalling rate, the Australians had to fall back. The troops were finally exhausted and could do no more; by 15 November they handed over to the Canadians.
I have often thought that many a youngster when he was hit out there on the Passchendaele heights … and he knew that the end had come – must have thought to himself: "well at least they'll remember me in Australia". C.E.W. Bean
Download Battle of Broodseinde map, 4 October 1917, situation 6 pm. (PDF file)
Download Passchendaele II battle map, 12 Oct 1917 (PDF file)
Download map of ground gained during entire Third Ypres Offensive (PDF file)
Read more about the Battle of Passchendaele (Third Ypres)
Anzac to Amiens by C. E. W. Bean, Chapter XXI (20 pages)
Official History by C. E. W. Bean, Vol. IV, Chapters XVII - XXII (270 pages)