Building Butts and Bayonets; A guide to moulding and casting replica rifles for the FWW dioramas

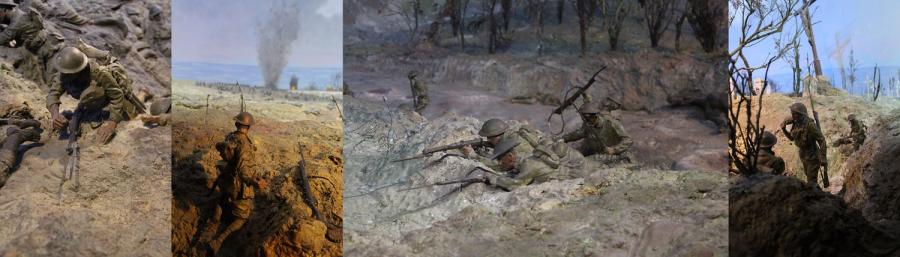
A large component of the conservation process and the overall rejuvenation of the First World War dioramas at the AWM has been to create new rifles and bayonets for missing or non-original rifles (suspected to be from previous interventions). Assessing the materials they were constructed from along with images from the initial diorama displays in the 1930’s we were able to identify original rifles and to hence find appropriate examples for moulding and casting to create replacements.
Weapons on some dioramas such as Somme Winter and Pozieres had to be almost completely replaced. In the case of Somme Winter we were fortunate that there was an original rifle still present. The figures on Somme Winter were also the largest figures within the dioramas so we were lucky to find an appropriate example. Similarly, none of the rifles on Pozieres were original and were made from a range of materials using various casting/moulding and carving methods. As there was no consistency within the existing rifles, a decision was made to replace all of them. This led to a hunt for an appropriately sized example in other dioramas. We were very lucky in that the figures in Dernancourt diorama matched the dimensions of those on Pozieres meaning that the rifles found on Dernancourt could be used to cast from. Once suitable examples were found the moulding and casting began.
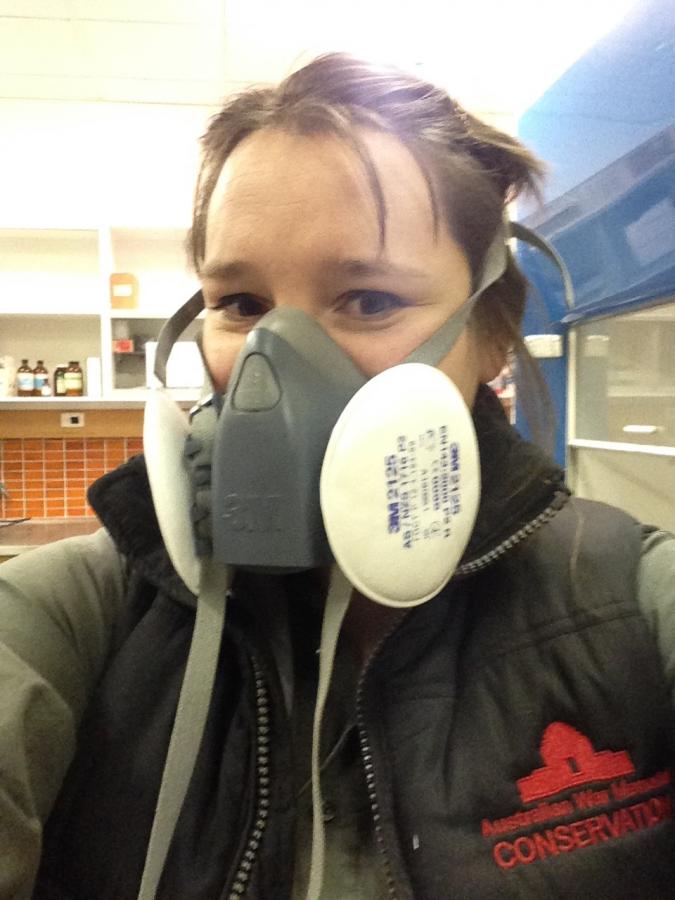
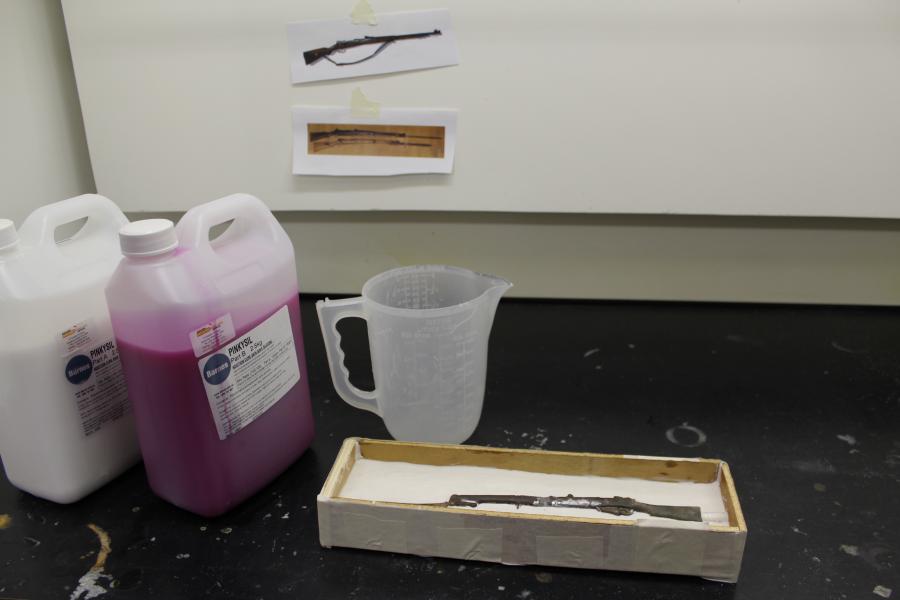
The diorama team took over the Chemistry Lab in the Memorial’s Mitchell Annex and with the assistance of our drive-in-drive-out conservator, Noel, (who taught us the basics of mould making) the construction of new rifles began. The lab was a perfect space for us to create our moulds and cast new rifles as we had a lab to ourselves. Safety equipment such as masks, protective clothing and the fume hood were essential in maintaining a safe working environment as we were using potent materials such as epoxy resin which required a well-ventilated area.
Just in case blog readers and moulding enthusiasts feel the need to make miniature replica rifles, the step by step process we used is described below.
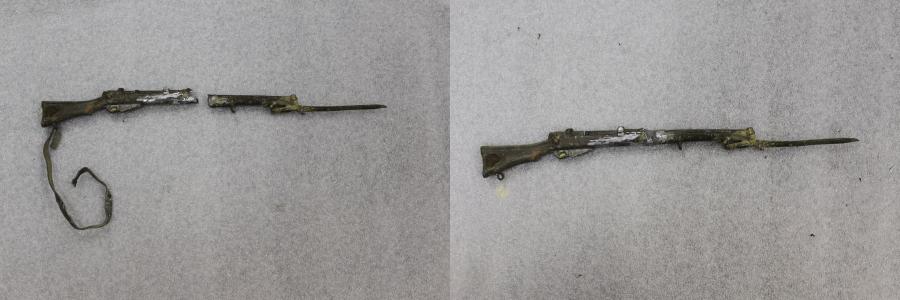
However, before we could make a replica of the rifle in the photo (image below), we first had to repair it. Many of the rifles found on the dioramas needed minor repairs. In this case we had to re-join the rifle. Rifles were re-adhered using a quick-setting adhesive, and then painted to conceal the repair. All items removed from the dioramas were labelled, kept in storage or returned to their position within the dioramas.
METHOD
Making a cast of a rifle requires a 2-part silicon mould. This process has been summarised in 5 Quick and easy steps! So you readers can join in on the fun!
STEP 1 – Modelling clay build-up
First find the parting line around the rifle which runs directly down the middle of the rifle. This line, if cut in half will give you two exact halves of the object. Once the parting line has been identified, the next step is to build modelling clay up around the rifle to the line, as seen in the Images below;
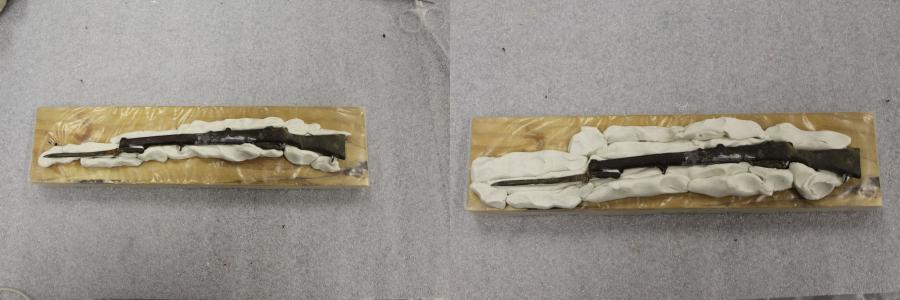
It is important that the clay around the rifle is flat, even and sealed around the object. If there isn’t a good seal, the silicon will leach under the rifle and ruin the mould once the silicon is poured.
It is also important to add a piece of dowel or tubing to an edge which will act as a funnel to pour the casting resin through once the mould has been completed. The clay must be built up to the parting line of the dowel also.
STEP 2 – Box Construction
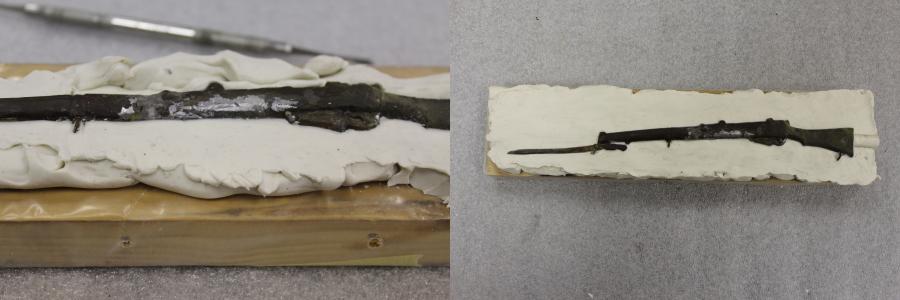
Once the modelling clay has been flattened and smoothed the next step is to construct a box around the modelling clay as shown in the images below. We used timber and plywood offcuts.
It is also important to seal the space between the clay and the box to eliminate any leaking of the silicon.
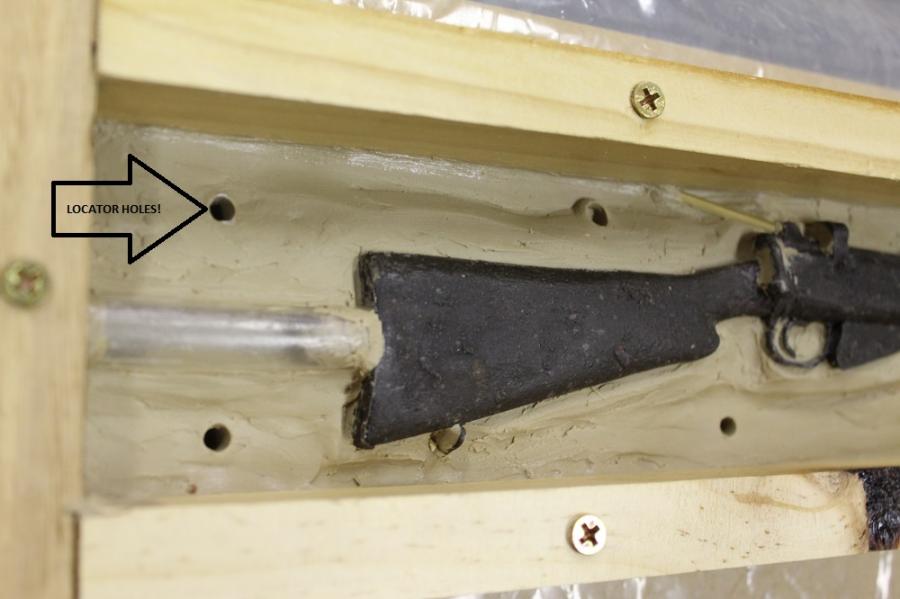
At this stage, (something that I forgot when I was constructing the mould), it is important to place locators on the modelling clay in order to line up each side of the mould. Here is an image of what I should have done at this stage.
STEP 3 – Pour the Silicon
Now you are ready to pour the first half of the mould. We used a commercially available silicon product Pinkysil. We chose this product for its relatively fast setting time, it’s easy to use and it is classified as a non-hazardous material, however before using we recommend reviewing the Material Safety data sheet
To start, using maths we all learnt in high school; work out the volume of PinkySil required by multiplying the width, depth and height. With such a small object, it is not necessary to subtract the volume of the object, but if you are trying this at home, then it is recommended. In this case, the volume required was about 300mL. The silicon solution was mixed at a 1:1 ratio (150mL:150mL) of Part A and Part B and mixed until the mixture was completely combined. It is vital that the mixture is completely combined. If not, the mixture may not set completely.
The silicon mixture needs to be poured from a height, in a constant, thin stream (See Images below). The thinner the stream, the better, because it eliminates the bubbles created by the stirring process. When pouring, keep the stream in one spot and allow the mixture to flow over the object to ensure that no air bubbles are created around the rifle.

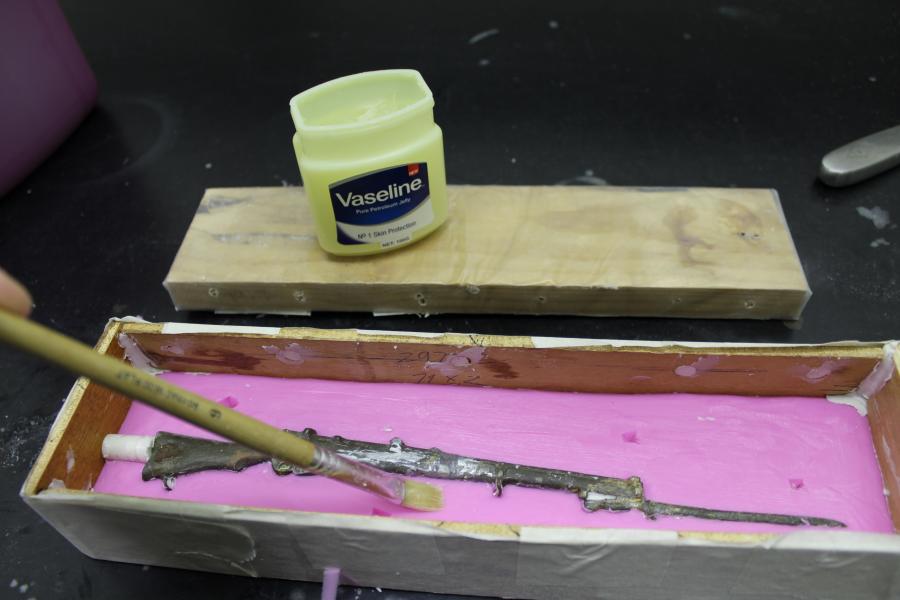
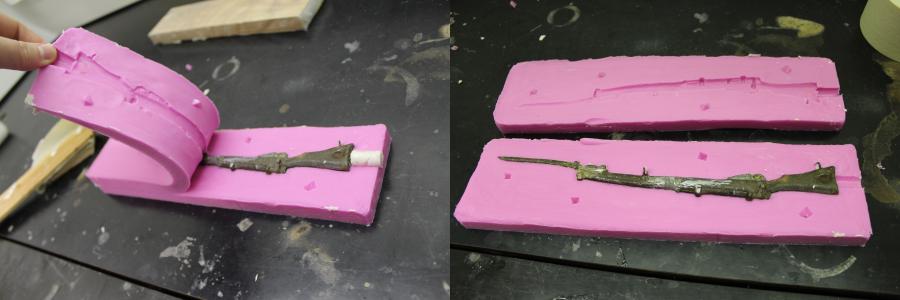
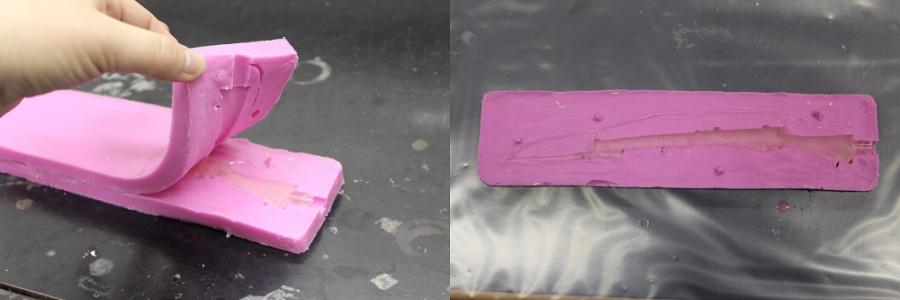
STEP 4 – Removal of Modelling clay
Once the first PinkySil has set, it is now time to flip it over, remove the modelling clay (See Images below) and cast the second half of the mould. You need to take care when removing the modelling clay from the rifle as you don’t want to break the seal between the silicon and the rifle. Before pouring the second half of the mould, the set silicon needs to be coated with Vaseline so that the two silicon layers don’t stick together. See Image below.

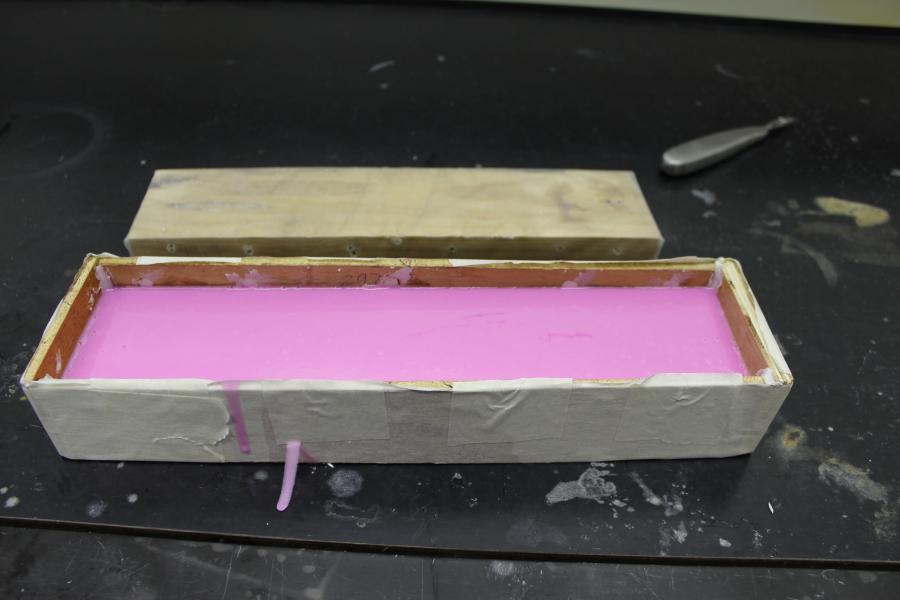
STEP 5 – Pouring Silicon (again)
Repeat step 3. See Image sequence below

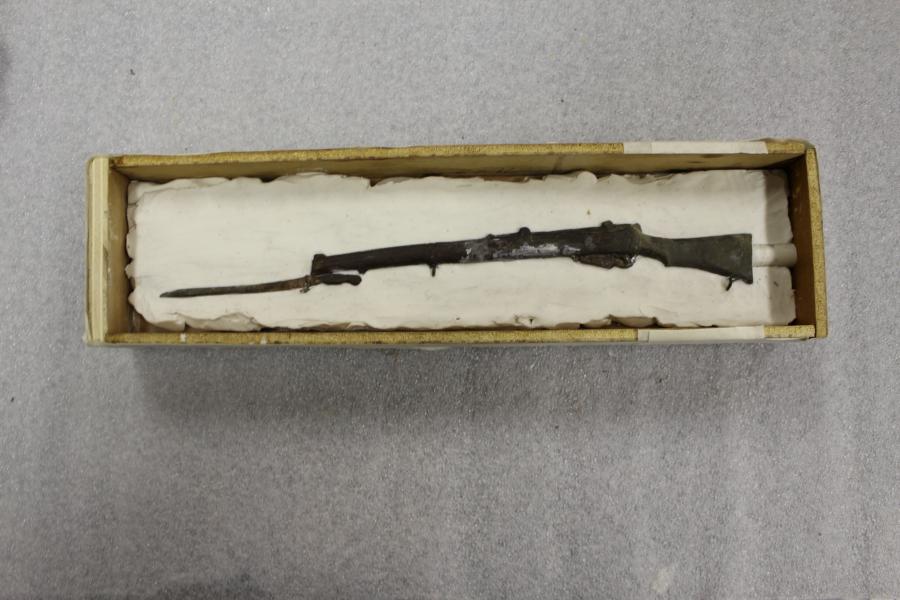
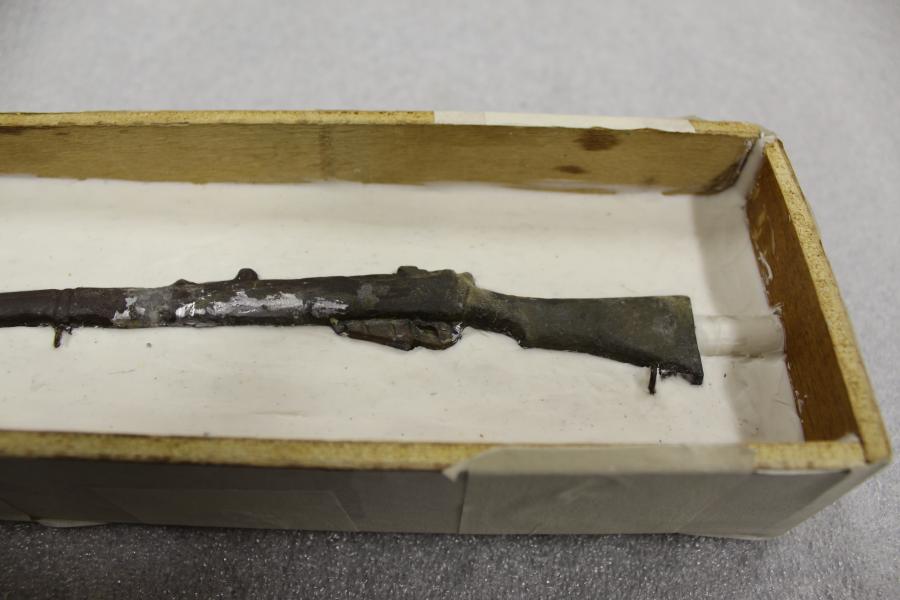
To finish; once the second half has set, peel the box away and the two halves should easily peel away from each other, as in image below
The second stage of this process is creating the resin cast from the silicon mould:
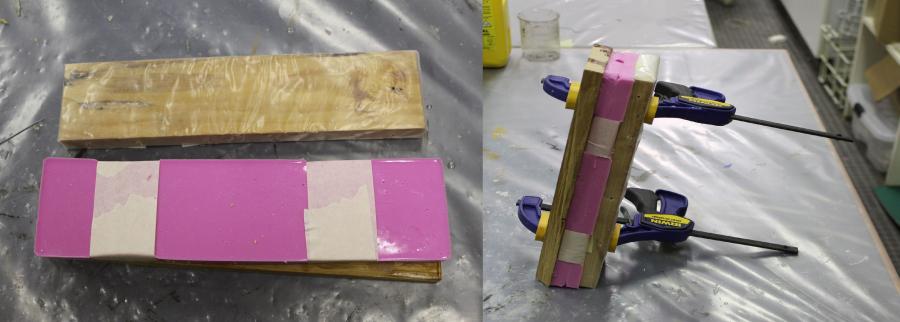
STEP 6 – aligning each half of the mould
First, line up both sides of the mould and tape them together as in below image. Once the halves are secured, place the mould in-between two pieces of timber and clamp evenly. See Image below
STEP 7 – Pouring of the Epoxy
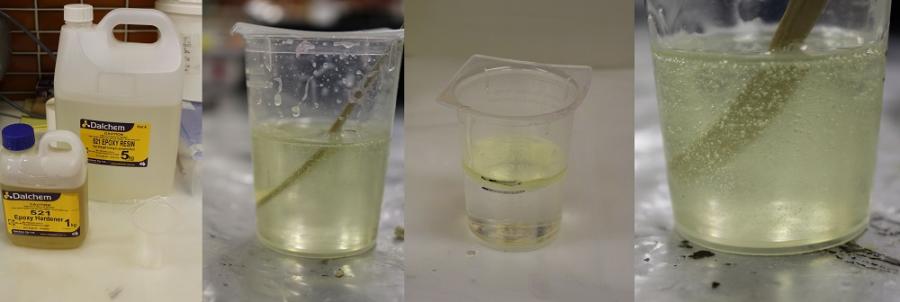
The next step is to mix the resin and catalyst solution. The resin we chose to create our replica items was a commercially available Dalchem 521 Epoxy Resin. Pouring the resin is similar to pouring the silicon from the previous stage. Measure out required amounts of resin and hardener, 5:1 ratio, and then mix thoroughly. After the mixture is completely combined, allow to sit for 5min or so. See Image sequence below. This is crucial in allowing the air bubbles created from the mixing process to float to the surface and pop. If there are too many air bubbles in the resin once it has been poured, there is less chance of the air bubbles escaping from the mould and they will set in the resin leaving small craters in your final cast.
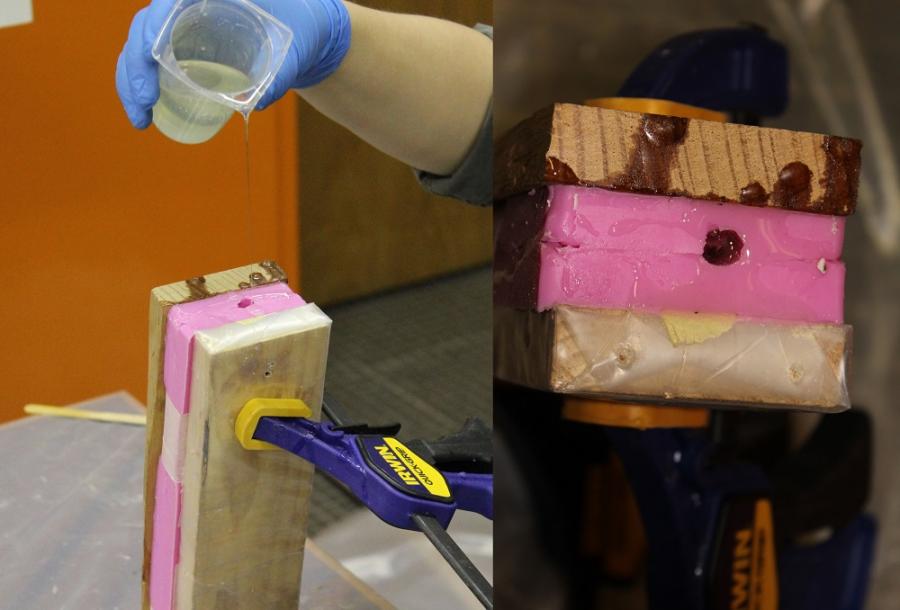
STEP 8 - Pouring the resin
When pouring the resin, the mould needs to be on at least a 45 degree angle, this will allow the resin to flow through the mould naturally, minimising the formation of air bubbles. The stream should be thin and held from a height. Again this is related to the air bubbles. The thin stream will burst the bubbles present in the resin and reduce the chance of them forming in the final cast. All of these adjustments will lead to a higher quality result. Pour the resin slowly and stop when the resin reaches the top. After the resin has settled and if the resin level has dropped, top up if necessary. See images below
Allow the resin to set. In our case we allowed at least 12hrs.
STEP 9 – Revealing your cast
Once the resin has set, carefully release the clamps and slowly peel away the two halves of the mould. Your beautiful, clear resin rifle should be revealed!
STEP 10 - Finishing touches
The final stage is to remove and sand-off excess resin and discrepancies then paint the rifles. A sealing layer was applied before they were painted to ensure adhesion between the paint layer and the epoxy substrate.
For the final paint layer we used Golden acrylic paints. See Images below
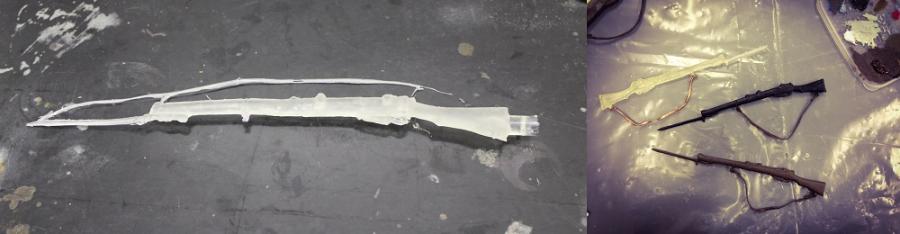
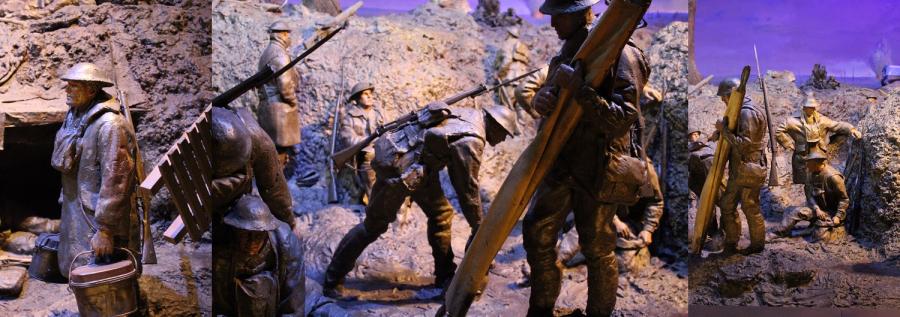
Below are some images of the final products which have been integrated into the dioramas in one of the final stages of their conservation process.