What did we do before Google Earth?
One of the many problems trench warfare presented to soldiers in the First World War was finding out what the enemy was doing behind his lines. The simple solution to this was height, and in a relatively short time many ways of getting men and a camera off the ground were developed.
Some are simple and ingenious, others were more complex: two German examples are an observation post disguised as a tree, and a periscope which can extend up to 25m in height. Observation balloons were successful but have their limitations, being tethered to the ground and full of flammable gas are the two most obvious. It was the infant technologies of aircraft and photography that quickly become the most effective form of aerial observation.
In a couple of years there are hundreds of aircraft taking thousands of aerial photographs which are used to update maps and provide a view of what is in the front line and beyond. Some of these valuable photographs are held in the collections of the Australian War Memorial.
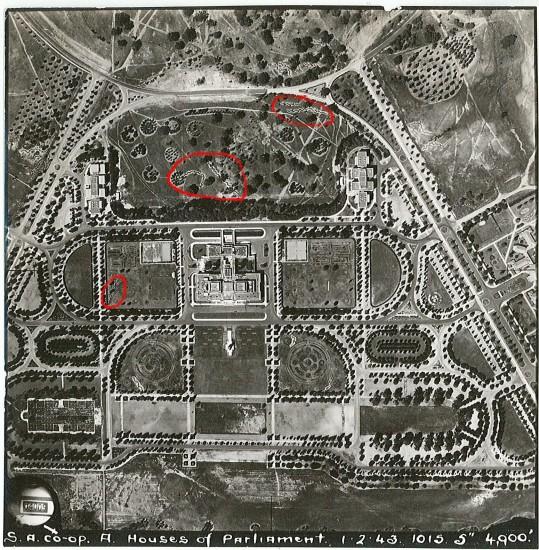
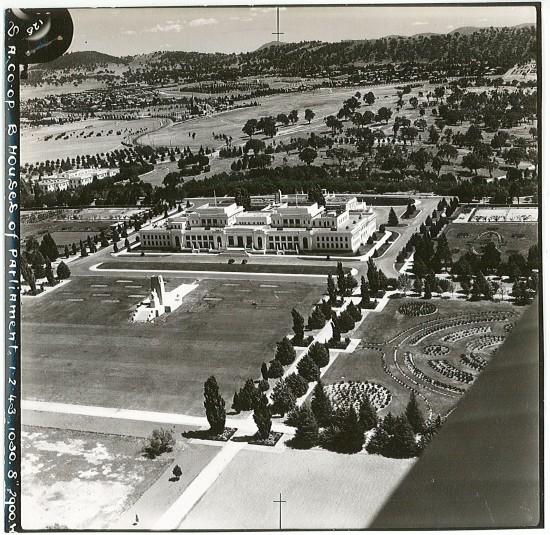
Aerial photos come in two main types, vertical and oblique. A vertical photo is taken with the camera pointing straight down towards the ground, while in an oblique the camera is at an angle. Here are two photos of what is now Old Parliament House in Canberra, taken by a training flight from RAAF Fairbairn on 1 February 1943.
In the photo you can see trenches that have been dug as air raid precautions on the grounds behind Old Parliament House, and between West Block (right) and the (now) National Archives of Australia on the left.
During the First World War aerial photography was often conducted using two-seater aircraft and simply having one of the crew stand up and lean over the side with a camera. From these humble beginnings spring a number of technological and tactical developments – camera and aircraft technology; a whole new branch of intelligence called photo interpretation; the science of converting information in a photo onto a map; the rapid reproduction of both maps and photos in large numbers, and even the way in which aircraft are organised and deployed in the air.
Technological developments soon see cameras attached to the side of the aircraft and allow for several photos to be taken relatively quickly in a single run. Single photos of a particular spot are useful, but it was soon realised that multiple images which overlap were better as they allowed for more detail to be noted.
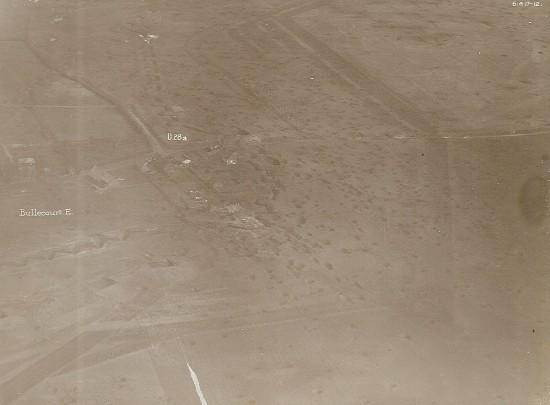
Understanding what you are looking at in a photo becomes an important job in the intelligence field, and lessons learned there feed across into developments in camouflage, such as dummy field works. The main feature of this photo of the village of Bullecourt are the belts of barbed wire that start in the top of the picture, four lines thick at the very top, which continues down the entire picture.
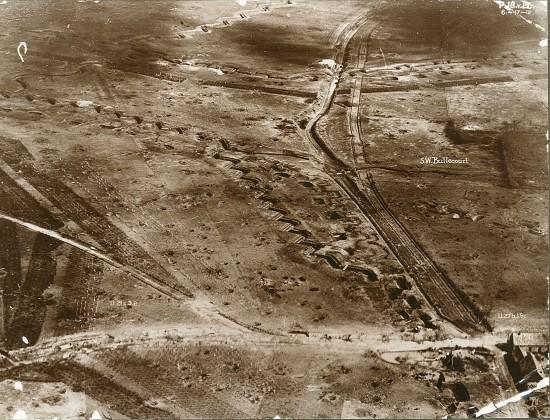
This photo shows another part of the Bullecourt defences, and the preparation that went into the Hindenburg Line defences is clear. In the belts of wire on the left you can see the posts on which it was strung. Then there is some open ground before reaching the first line of trenches and the dugouts behind these where the troops would live and shelter during artillery bombardment.
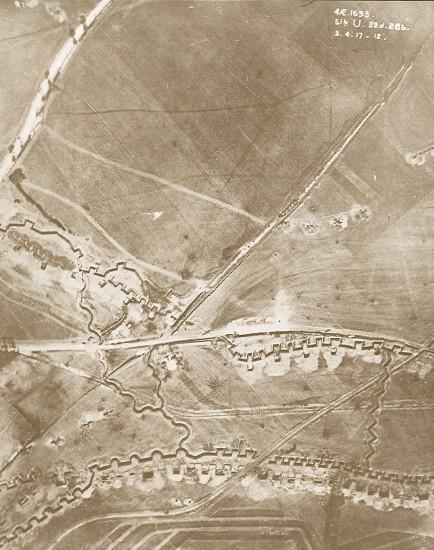
In the image below you can see the wire at the bottom, then examples of the different shapes of front line trenches including the square and curved traverses. The white colour in front of trenches is the chalky soil thrown out when the trenches were dug. Running from bottom to top are the communications trenches - the wavy line on the left and zig-zagged line on the right, which lead to the second line on trenches. Behind these on the grass can be seen the tracks of the horse-drawn transport and foot traffic of men and supplies moving in and out of the lines, and then the circular features of what may be an artillery battery. Photo interpreters would note all this detail and more onto maps which are then printed and distributed to the various units in that area.
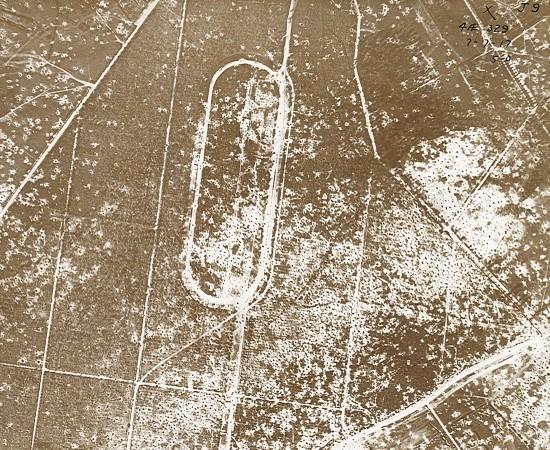
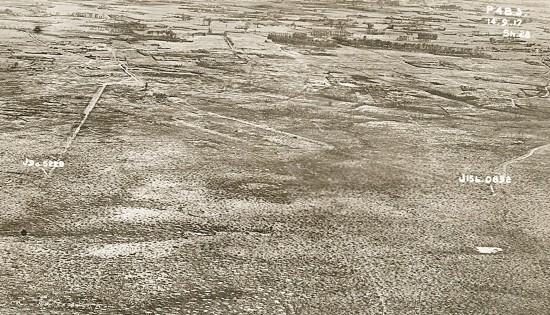
The following photographs show what could happen to a landscape when the focus of battle fell on it. The area is Polygon Wood, east of the Belgian city of Ypres, and for most of the war it is behind the German lines.
In mid-1917 Ypres and its environs became the strategic focus of the entire Western Front, part of a plan of the British Commander General Haig to breakthrough to the Belgian coast. Known to history as the Third Battle of Ypres, or Passchendaele, it began with the capture of the Messines ridge in June. Though it was far from the breakthrough battle Haig had hoped for, over the following months the front line crept steadily closer towards Polygon Wood.
A feature of this phase of the war is the understanding that artillery is the key to victory, in both offense and defense, and it is being applied to the battlefields in ever increasing numbers and sizes of guns. By September, Polygon Wood is now part of the German frontline, and the full fury of hundreds of guns begin to fall on it.
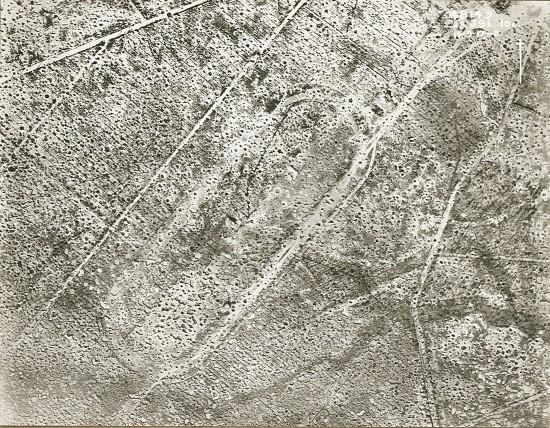
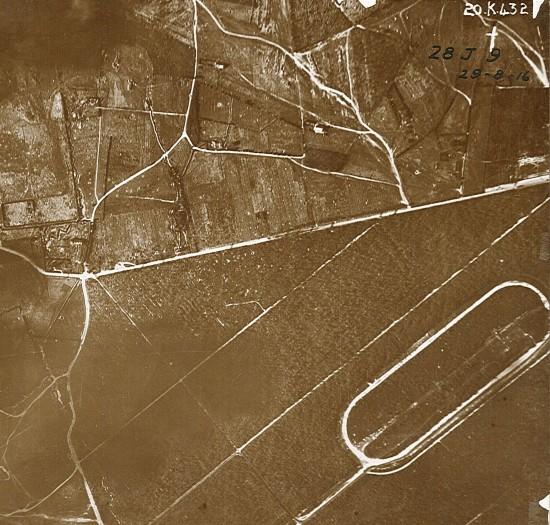
It is on the right flank of a four kilometre objective line which on 26 September is attacked and captured in a spectacular victory. Oblique photos are useful in showing how completely artillery, (in combination with geology and weather), could reduce productive farm land into an almost impassable, featureless morass and how suddenly the landscape can become normal again.
Some technological developments (machine guns and quick firing artillery being two) are widely attributed as creating the stalemate of trench warfare in the First World War. Aerial photography was a crucial development that helped that stalemate to be broken.