Australian War Memorial Logo
Search

Donate Today

  • Collection Open Information Close Information
    • Official Histories & Unit Diaries
    • Understanding the Collection
    • Research at the Memorial
    • Donating to the Collection
    • National Collection Loans
    • Projects
  • People
  • Visit
  • Commemorate Open Information Close Information
    • Last Post Ceremony
    • Honour Rolls
    • Anzac Day
    • Remembrance Day
    • Customs & Ceremony
    • Speeches
  • Learn Open Information Close Information
    • Schools & Teachers
    • Memorial Articles
    • Encyclopedia
    • Understanding Military Structure
    • Podcasts
    • Glossary
    • Magazine
  • Get Involved Open Information Close Information
    • Donations & Bequests
    • Corporate Partnership
    • Employment Opportunities
    • Volunteer at the Memorial
    • Friends of the Memorial
    • eMemorial Newsletter
    • Grants, Scholarships & Residencies
    • Research Papers
  • Shop Open Information Close Information
    • Memorial Shop
    • Images, film and sound
    • Lone Pine Seedlings

Breadcrumb

  1. Home
  2. Memorial Articles
  3. blog
  4. Bapaume to Bullecourt: the fighting in France, 191...

Main navigation

  • Our People
  • Our Work
  • Our Organisation
  • Media Centre
  • Memorial Articles
    • Australians and Peacekeeping
    • Australians at war
    • Gulf War 1990-1991
    • Journal of the Australian War Memorial
    • Korean War 1950 - 1953
    • NAIDOC Week
    • RAAF Centenary
    • Victory in the Pacific Day
  • Speeches

Bapaume to Bullecourt: the fighting in France, 1917

28 February 2020
pic

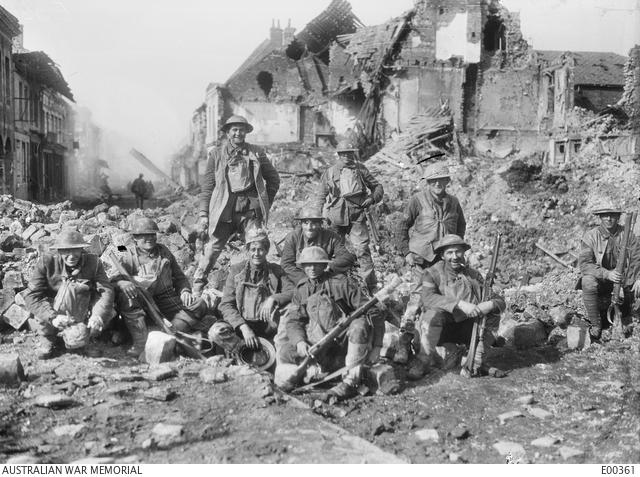
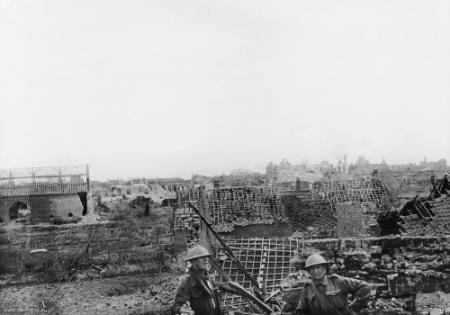
Members of B Company, 30th Battalion (in support) amongst the ruins on the Cambrai Road, Bapaume, during the day on which the Australians entered the town. Left to right: Unidentified; 358 Corporal (Cpl) C Boland; 5796 Lance Corporal R McKinnon (standing) holding a pistol; Private (Pte) Page (wearing a Pickelhaube); 3848 Cpl F McDowell (back); 2267 Cpl Cecil Edward Alcorn Belgian Croix de Guerre (foreground); 341 Sergeant Max Kenneth Dick Arkell (standing) (later killed in action 28 August 1918); 792 Pte A C Walker MM (standing); 466 Cpl W H Linsley.

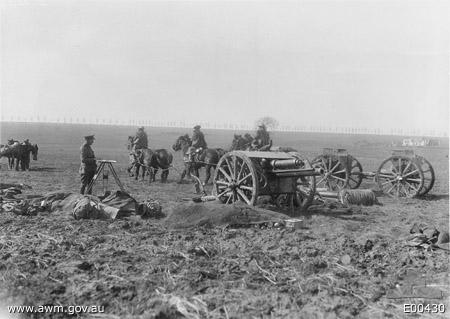
At the beginning of 1917 victory seemed nowhere in sight. However for a while, from late February, hopes were lifted. Along the Somme front line and elsewhere, the Germans began to withdraw several kilometres to their newly-developed defensive zone which the British dubbed “the Hindenburg Line”. This apparent retreat was a tonic for the allies who advanced in pursuit. But it was an illusion; the Germans were just staging a voluntary withdrawal to stronger and better prepared positions. It was against these solid defences at a point near the village of Bullecourt that four Australian divisions, one after the other, were thrown during April and May 1917.

  • Portable Document FormatBasic Map: Bapaume to Bullecourt from the Official History Vol IV, p 156 [65.9 kB PDF]
  • Portable Document FormatDownload detailed original map of the capture of Lagnicourt on 26 March [893.8 kB PDF]

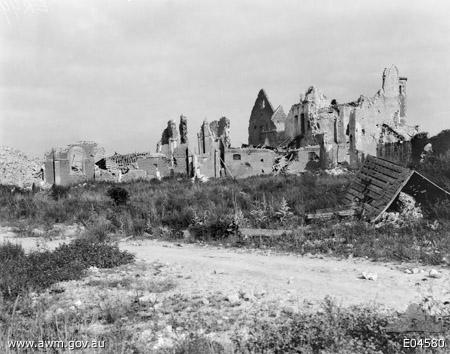
The capture of Bapaume

A group of German engineers preparing mines in a French village before withdrawing to the Hindenburg Line.

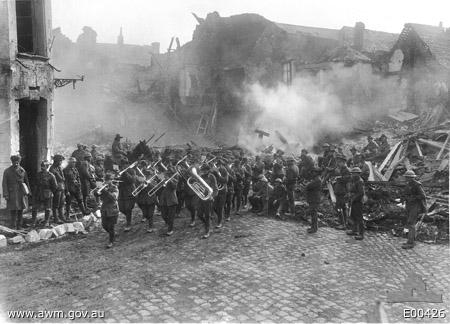
Bapaume was a large German-held town almost within sight of the Australians’ trench lines throughout the winter months on the Somme. Suddenly, from 24 February 1917 it became evident that the enemy was retiring. The British advanced after them, and by the morning of 17 March Australian troops reached the outskirts of Bapaume. The soldiers’ heightened spirits were exemplified by the band of the 5th Australian Brigade playing amid the burning ruins as they marched into the old town square on the 19th. However booby traps and time bombs had been left behind; one exploded in the town hall a week later burying men and killing twenty-five.

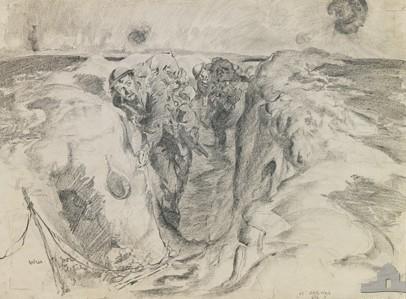
Rarely did Australian soldiers experience such exhilaration as on that morning when, with the Somme morass finally behind them, they skirmished across green fields.

C.E.W. Bean, Anzac to Amiens

Fighting up to Bullecourt

Band of the 5th Australian Infantry Brigade passing through the Town Square of Bapaume on 19 March, playing the 'Victoria March'.

From February 1917 the German forces facing the Australians began withdrawing to the Hindenburg Line. The Australians pursued them and there was heavy fighting around a network of small villages. Vaulx-Vraucourt, Morchies and Beaumetz were among those captured. But there was stiffer resistance during the attempts to take Lagnicourt, Noreuil and Hermies; the initial hasty attempt to take Noreuil was repulsed. In some of these sharp actions over three weeks five Australians won the Victoria Cross. Finally, by 9 April the vital string of villages leading up to the Hindenburg Line was in British hands. Before the Australians, and within the broad German line of entrenchments and barbed-wire, stood the fortified village of Bullecourt.

An 18 pounder of the Australian Field Artillery behind Vaulx, preparing to shell Lagnicourt.
'Fletch & Dan coming back to Igaree Corner from Lagnicourt' a drawing by Will Dyson, 1917.
Ruins of Lagnicourt Church 1917 (AWM E04580).
Two Australian soldiers among the ruins of Lagnicourt, April 1917 (AWM C00470).

Last updated: 30 March 2021

  • Back to Articles
1 The Donations and bequests

Donations & Bequests

Your generous donation will be used to ensure the memory of our Defence Forces and what they have done for us, and what they continue to do for our freedom remains – today and into the future.

Find out more
2 Visit Transcribe.awm.gov.au

Transcribe

Help preserve Australia's history by transcribing records from the National Collection. Enhance accessibility and discoverability for all Australians.

Find out more
The placesofpride

Places of Pride

Places of Pride, the National Register of War Memorials, is a new initiative designed to record the locations and photographs of every publicly accessible memorial across Australia.

Find out more
Visit the Australian War Memorial

Visit the Australian War Memorial

The Australian War Memorial is open for visitors as we work to expand our galleries. Entry is free and tickets are not required.

Find out more
Canberra Highlands in Grayscale

ACKNOWLEDGEMENT OF
TRADITIONAL CUSTODIANS

The Australian War Memorial acknowledges the traditional custodians of country throughout Australia. We recognise their continuing connection to land, sea and waters. We pay our respects to elders past and present.
Location map of The Australian War Memorial
The Australian War Memorial building

The Australian War Memorial

Fairbairn Avenue
Campbell ACT 2612
Australia
View on Google Maps (opens in new window)
Google Map data ©2025 Google
Australian War Memorial Logo
  • Go to AWM Facebook
  • Go to AWM Trip Advisor
  • Go to AWM Instagram
  • Go to AWM Youtube

Footer

  • About
  • Contact
  • Venue Hire
  • Media
  • WM Magazine
  • Donate Today

The Australian War Memorial

Fairbairn Avenue

Campbell ACT 2612

Australia


Opening Hours

10 am to 4 pm daily (except Christmas Day)


In preparation for the daily Last Post Ceremony,

galleries are progressively closed from 3:40 pm.


Public entrance via Fairbairn Avenue, Campbell ACT 2612

Sign up to our newsletter

Subscribe

Legal

  • Copyright
  • Disclaimer
  • Privacy Policy
  • Accessibility
  • Freedom of information

Copyright 2025 Australian War Memorial, Canberra. All rights reserved