Australian War Memorial Logo
Search

Donate Today

  • Collection Open Information Close Information
    • Official Histories & Unit Diaries
    • Understanding the Collection
    • Research at the Memorial
    • Donating to the Collection
    • National Collection Loans
    • Projects
  • People
  • Visit
  • Commemorate Open Information Close Information
    • Last Post Ceremony
    • Honour Rolls
    • Anzac Day
    • Remembrance Day
    • Customs & Ceremony
    • Speeches
  • Learn Open Information Close Information
    • Schools & Teachers
    • Memorial Articles
    • Encyclopedia
    • Understanding Military Structure
    • Podcasts
    • Glossary
    • Magazine
  • Get Involved Open Information Close Information
    • Donations & Bequests
    • Corporate Partnership
    • Employment Opportunities
    • Volunteer at the Memorial
    • Friends of the Memorial
    • eMemorial Newsletter
    • Grants, Scholarships & Residencies
    • Research Papers
  • Shop Open Information Close Information
    • Memorial Shop
    • Images, film and sound
    • Lone Pine Seedlings

Breadcrumb

  1. Home
  2. Memorial Articles
  3. blog
  4. “Get for your lives, there’s a bomb in the trench!...

Main navigation

  • Our People
  • Our Work
  • Our Organisation
  • Media Centre
  • Memorial Articles
    • Australians and Peacekeeping
    • Australians at war
    • Gulf War 1990-1991
    • Journal of the Australian War Memorial
    • Korean War 1950 - 1953
    • NAIDOC Week
    • RAAF Centenary
    • Victory in the Pacific Day
  • Speeches

“Get for your lives, there’s a bomb in the trench!”

Meghan Adams

09 November 2020
Collection Item C284705

Accession Number: P01982.001

3347 Sergeant David Emmett Coyne

David Emmett Coyne was just 19 years old when he enlisted in the Australian Imperial Force (AIF) on the 25th of January 1916. A farmer from Queensland, Coyne spent only a few months training in Australia before embarking from Hobart in May on board HMAT Seang Choon. Private Coyne reached Egypt a month later, and wrote to his sister, “We recognized a hospital ship and an Australian troopship with Australian soldiers on board, and the old Australian Cooee rang out as soon as we came within hailing distance. It was like a sight of old Australia to hear the cooee so many thousands of miles away from home.”

While he was in Egypt, Coyne fell ill and was sent to hospital, suffering from bronchitis. He was later sent to England to recover, and from there embarked for the Western Front. Coyne reached France in December 1916, joined the 31st Battalion and was promoted to the rank of lance corporal. In January the following year, owing to the conditions of the front lines, Coyne contracted influenza and was again sent to hospital in England, where he was also treated for trench foot. Several months later, in June 1917, Coyne recovered from his illnesses and joined the bombing school at Lyndhurst in England’s south-east. He was promoted to sergeant and undertook a course of instruction in bomb throwing. On completion of his course, Coyne spent four months working as an assistant instructor at the school before returning to the front lines in October 1917.

Collection Item C999231

Accession Number: C00489

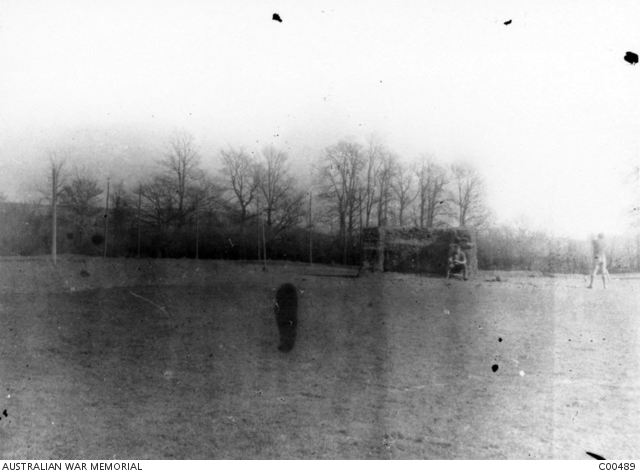
The Lyndhurst Bombing School near Southampton, England, where Sergeant Coyne worked as an assistant instructor.

Coyne worked out of brigade headquarters in France until March 1918, when he rejoined his battalion around the Wytschaete sector of the front in Belgium. The 31st Battalion had a quiet start to the year with duties comprising of working parties, trench digging and stints in the front lines. Coyne spent time training in live throwing, and alongside other specialist trainers teaching in signaling and gun range practice.  By May 1918, the 31st had been moved to the Corbie sector in Northern France where it spent time in front lines undertaking raids and patrols.

Collection Item C141499

Accession Number: REL/18691

Bomb Throwers Qualification Badge belonging to 3347 Sergeant David Emmett Coyne, currently on display in the Memorials First World War galleries.

As a qualified bombing instructor, Coyne had been ordered by his platoon commander to periodically inspect bomb supplies to ensure they were in good working condition. On the evening of the 15th of May 1918, Coyne, suspicious of the quality of some Mills grenades issued in the front lines, decided to test the bombs by throwing them into no man’s land. Grabbing one of the bombs, Coyne placed a foot on the fire step, and was raising his arm to throw when he lost his balance, dropping the bomb into the trench. “Get for your lives!” he yelled, “there’s a bomb in the trench!” Struggling to find the bomb in the darkness, Coyne threw himself over it to shield his comrades from the blast. After the explosion, Private R.J. Sullivan asked if anyone had been hit. Coyne, badly wounded, replied, “Yes Sully, I’ve got the full issue of it. I lay on it thinking you chaps couldn’t get out in time.”

Collection Item C204162

Accession Number: P01230.001

Studio portrait of 3347 Sergeant David Emmett Coyne.

Collection Item C994858

Accession Number: REL/18689.001

3347 Sergeant David Coyne’s Albert Medal in Gold, currently on display in the Memorials First World War galleries.

Sergeant Coyne was taken to the 61st Casualty Clearing Station suffering a fractured right leg and multiple bomb wounds. His wounds were such that within hours he succumbed, dying on the 15th of May 1918. For his actions that day, Sergeant Coyne was awarded the Albert Medal in Gold, the only member of the AIF in the First World War to receive such an honour. He was buried at Vignacourt British Cemetery beneath the words of his bereft family: “He gave his life to save his comrades. Rest in peace”

Collection Item C207221

Accession Number: P01340.002

Original headstone over the Grave of 3347 Sergeant David Emmett Coyne, Vignacourt British Cemetery, France.

Vignacourt British Cemetery

Vignacourt British Cemetery pictured today. Courtesy Commonwealth War Graves Commission.

Author

Meghan Adams

Last updated: 30 March 2021

  • Back to Articles
1 The Donations and bequests

Donations & Bequests

Your generous donation will be used to ensure the memory of our Defence Forces and what they have done for us, and what they continue to do for our freedom remains – today and into the future.

Find out more
2 Visit Transcribe.awm.gov.au

Transcribe

Help preserve Australia's history by transcribing records from the National Collection. Enhance accessibility and discoverability for all Australians.

Find out more
The placesofpride

Places of Pride

Places of Pride, the National Register of War Memorials, is a new initiative designed to record the locations and photographs of every publicly accessible memorial across Australia.

Find out more
Visit the Australian War Memorial

Visit the Australian War Memorial

The Australian War Memorial is open for visitors as we work to expand our galleries. Entry is free and tickets are not required.

Find out more
Canberra Highlands in Grayscale

ACKNOWLEDGEMENT OF
TRADITIONAL CUSTODIANS

The Australian War Memorial acknowledges the traditional custodians of country throughout Australia. We recognise their continuing connection to land, sea and waters. We pay our respects to elders past and present.
Location map of The Australian War Memorial
The Australian War Memorial building

The Australian War Memorial

Fairbairn Avenue
Campbell ACT 2612
Australia
View on Google Maps (opens in new window)
Google Map data ©2025 Google
Australian War Memorial Logo
  • Go to AWM Facebook
  • Go to AWM Trip Advisor
  • Go to AWM Instagram
  • Go to AWM Youtube

Footer

  • About
  • Contact
  • Venue Hire
  • Media
  • WM Magazine
  • Donate Today

The Australian War Memorial

Fairbairn Avenue

Campbell ACT 2612

Australia


Opening Hours

10 am to 4 pm daily (except Christmas Day)


In preparation for the daily Last Post Ceremony,

galleries are progressively closed from 3:40 pm.


Public entrance via Fairbairn Avenue, Campbell ACT 2612

Sign up to our newsletter

Subscribe

Legal

  • Copyright
  • Disclaimer
  • Privacy Policy
  • Accessibility
  • Freedom of information

Copyright 2025 Australian War Memorial, Canberra. All rights reserved