“Four days of unhappiness and worry”
When 15,000 Australian and British prisoners of war refused a Japanese order to sign a pledge not to escape, Changi Camp Commander General Shimpei Fukuye retaliated by ordering their relocation to Selarang Barracks on 30 August 1942. The prisoners spent the following days in an overcrowded, diseased square, packed with starving men, in what became known as the Selarang Barracks Incident.
The pledge order came after the capture of four escaped prisoners: Australians Corporal Rodney Breavington and Private Victor Gale, and English privates Harold Waters and Eric Fletcher.
While a successful escape was unlikely, and recapture could be punished by death, the prisoners refused to sign the pledge. British Private Michael Hubert wrote in his diary that it “was very unfair to put a prisoner or his honour in such a position and it was contradictory to all the laws of warfare, International rules, Red Cross and Geneva Convention.”
While not explicitly told not to sign the pledge, he recalled, “hints were thrown out and we were told to uphold the traditions of the empire and that this was our chance to support King and Country.”
Not knowing how long they would be gone, or if they would return, the soldiers gathered everything they could carry for the move to Selarang. Hubert wrote, “it was a crazy sight, seeing this mass of humanity winding its way twelve-deep across the roads like homeless refugees.”

Murray Griffin, The Move to Barrack Square, work on paper, Singapore: Changi, 1943.
The overcrowding was unbearable. Barrack blocks designed to hold approximately 90 now each held 1,200 men. With the buildings overflowing, most of the soldiers slept in the open air. Hubert referred to the square as “The Miniature Concentration Camp”. Looking over the square from one of the barrack blocks, he described the sight: “The whole 60,000 square yards was just a mass of seething humanity, sleeping, reading, resting, arguing, digging, erecting, walking, playing, carrying, on duty, off duty, on fatigues, cooking, and of course, swearing.”
Rations and supplies were stretched thin; firewood was so scarce that barrack doors were broken down to fuel the kitchen boilers. There were three taps in the square from which each prisoner was allocated a gallon of water a day. As this had to be used for drinking and to cook rice, little water was left for the men to wash.

This photograph showing conditions at Selarang in early September 1942 was secretly taken by and concealed in the false bottom of a water bottle that was later presented to the Australian War Memorial. Photograph by George Aspinall.
The biggest concern was disease. When the men were moved into Selarang on 2 September there were no latrines. The prisoners dug two latrines that first night. Three and a half metres long, 60 centimetres wide, and 4.5 metres deep, the latrines sat in the centre of the square. Over the next four days, 22 more were dug. Despite continuous efforts to contain the waste, the latrines contributed to the spread of disease.
By the end of the first day, dysentery had begun to spread. Requests for the sick to be moved out of the square to hospital were refused, further spreading the disease.
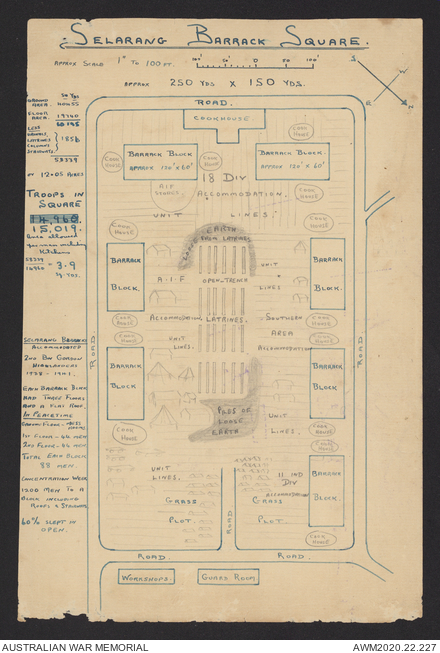
Map of Selarang Barracks drawn by Private Michael Stephen Hubert. AWM2020.22.227
Despite the worsening situation, the men still refused to sign the pledge.
General Fukuye’s reaction to the stalemate was to escalate retribution, ordering the execution of the four re-captured prisoners, who were killed by firing squad. Lieutenant Colonel Frith wrote in his witness statement, “The whole procedure was very badly organised and of an unnecessarily cruel nature.”
The prisoners still refused to sign.
On 3 September, Private Ronald Alfred Harper wrote in his diary, “Still in Square. Conditions terrible. Sickness prevalent. Still refused to sign papers. Rations cut down a third.”
By 4 September it was clear that more men would become ill and likely die as a result of the conditions at Selarang. Colonel E.B. Holmes, the commanding officer of the British and Australian forces in Changi, issued a statement ordering all prisoners to sign the no escape pledge by 11 am the following day.
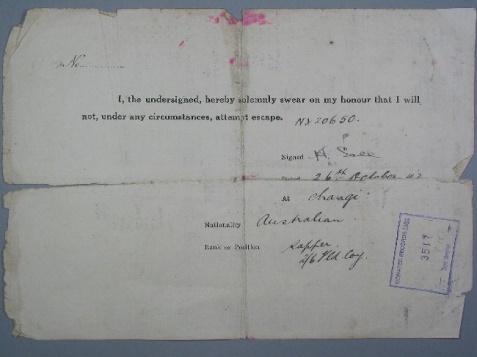
Sapper Henry George Sale’s signed pledge. Sale died of illness while working on the Burma–Thailand Railway 15 months later. His Roll of Honour record is available to view here. RC01184
Holmes felt it was his duty to give these orders for the health and wellbeing of his men, and later wrote that he believed that Allied forces would understand the actions that had been taken under difficult circumstances. In his final point in the order, he declared, “I wish to record in this order my deep appreciation of the excellent spirit and good discipline which all ranks have shown during this trying period.”

On 5 September, having signed the pledge, the prisoners were returned to their original camps. Hubert wrote that “it was grand to leave such a derelict place behind us and Selarang Square will always bring memories back to us of four days of unhappiness and worry”.
General Fukuye was tried at the Singapore War Crimes Trials in 1946 and was found guilty of general mistreatment of the prisoners, and the illegal execution of four prisoners. He was executed by firing squad.