Remembering the battle of Hamel
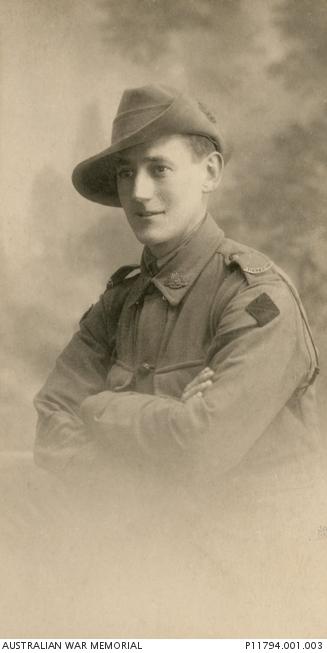
Private Frank Roberts fought during the battle of Hamel 100 years ago.
On the afternoon of 4 July 1918, Private Frank Roberts of the 21st Battalion wrote in his diary bemoaning the life of an infantryman.
He had just participated in one of the most successful engagements fought by Australians on the Western Front during the First World War, but the 30-year-old orchardist from Hawthorn wasn’t too happy about the early morning start and complained about being “loaded up like a mule”.
With 200 rounds of small arms ammunition, two Mills bombs, an extra water bottle, a shovel down the back, and a pannier for the Lewis gun, he lamented that it was “all hellish weighty” before going on to describe how his “knees knocked when the barrage opened”.
“After the start all trepidation vanished,” he wrote matter-of-factly. “Wonderful barrage put up … We caught glimpses of Fritz going for life. No return barrage and no machine-gun fire. An easy walkover. Slung my gun and stumbled across. Experiencing none of the ‘blood lust’… A most prosaic affair.”
It was, according to Australian War Memorial senior historian Dr Aaron Pegram, a remarkably relaxed account of what became known as the battle of Hamel 100 years ago.
“It was a little battle, that made a long-lasting impression on the sort of battles fought on the Western Front in 1918,” Dr Pegram said.
“Lieutenant General Sir John Monash meticulously planned for the battle to last 90 minutes. It lasted 93 minutes, with all units involved in the assault taking their objectives, and the battle plans for Hamel became a model for future successes.”
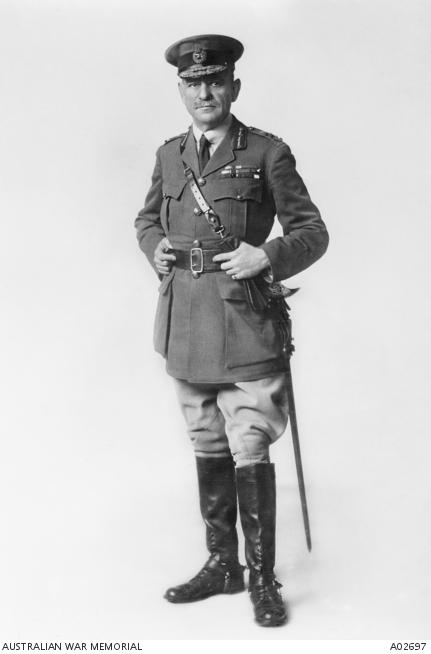
Portrait of Lieutenant General Sir John Monash, who made meticulous plans for the battle of Hamel during the First World War.
The battle of Hamel was the first major British offensive since Cambrai in November 1917 and the first major action of the Australian Corps under Monash’s command.
“Hamel was far from the traditional battle of mud and trenches that had characterised much of the fighting on the Western Front,” Pegram said.
“With infantry, armour, artillery and aircraft at his disposal, Monash had the good fortune of commanding a recognisably modern weapons system that influenced the conduct of British operations during the last 100 Days offensive between August and October 1918.
“Monash likened this all-arms battle to a symphony in which he had been its maestro. He said: ‘A perfect modern battle plan is nothing so much as a score for an orchestral composition, where the various arms and units are the instruments, and the tasks they perform are their respectful musical phrases. Every individual unit must make its entry precisely at the proper moment, and play its phrase in the general harmony.’”
The battle began in the early hours of the morning with more than 600 guns of all calibres bombarding the German positions at the village of Hamel in northern France. With the gunners laying down a curtain of fire, British Mark V tanks rolled over the German barbed wire and silenced machine-gun posts, while Australian and American infantry assaulted with Lewis guns, rifles, and grenades. Four companies of American troops (roughly 1,000 men) were attached to two Australian brigades to bolster the battle-depleted battalions, while giving the Americans first-hand battle experience. The Royal Air Force also dropped more than 100,000 rounds of small-arms ammunition to ground troops by parachute during the battle.
“There are some Australian units who were assaulting on the far right flank of the Australian Corps front,” Dr Pegram said. “The Australian artillery crashed down in front of them in a supporting bombardment that was designed to keep the Germans away from their machine-guns. The artillery fire comes down much like a rolling curtain of high explosives and shrapnel that slowly moves forward ahead of their advance.
“It’s very difficult for the Germans to put up much of a fight with artillery so accurate and so devastating, and there are accounts by men like Frank Roberts who bemoan the fact they are carrying so much kit and equipment and the Germans they encounter aren’t putting up much of a fight – the Germans are stunned and demoralised and surrendering in great numbers.
“In other cases the artillery doesn’t land shells where they’re supposed to, and German resistance stiffens. In the case of the 4th Brigade, none of the tanks that were supposed to support them turned up where they were supposed to be. The infantry came up against uncut barbed wire, much like they had done at Bullecourt in April 1917, and they incurred casualties from German machine-gunners who very stoically remained at their posts.”
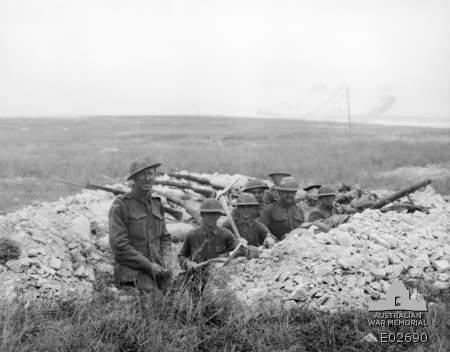
American and Australian troops dug in together during the Battle of Hamel.
The capture of Hamel and its surrounding areas was a significant tactical victory for the Australian Corps, providing an important foothold around the Somme, as well as adding depth to defences on Hill 104 and the Villers-Bretonneux plateau. Perhaps most importantly, this area bolstered the allied defence of Amiens.
“At Hamel, the Australian Corps attacked on a six-kilometre front and advanced no further than two kilometres, that’s it,” Dr Pegram said.
“It was not a ‘blitzkrieg’ battle, but by Western Front standards that is actually a significant advance, considering that ground gained throughout 1916 and 1917 was done a couple of hundreds of metres at a time.”
Some 1,600 Germans were taken prisoner during the short, sharp engagement, and a great many machine-guns and mortars were captured.
Australians Thomas Axford and Henry Dalziel were awarded Victoria Crosses for their actions that morning, and one of the Americans, Thomas Pope, was awarded a Distinguished Conduct Medal by the British forces and the US Medal of Honour for silencing German machine-gun positions.
Today, the battle is considered to be one of the most successful actions fought by the AIF and is regarded as something of a turning point in the Australian combat experience on the Western Front. But it was not without cost. The Australians suffered 1,400 casualties, and the Americans almost 200.
“There has been a recent myth that Monash’s tactics helped bring an end to the war and helped save lives, but we have to keep in mind that the Australian Corps still suffered casualties in these costly but successful actions,” Dr Pegram said.
“There are about 400 Australian dead at Hamel, and the Australians, from then onwards to the 8th of August through to their last action of the war at Montbrehain in 1918, were in daily contact with the Germans.
“They incurred just as many casualties as they had in 1916 and 1917. But that’s the nature of the war on the Western Front. Although successful, the Australian Corps under Monash’s command loses about 35,000 men – dead, missing and wounded. These losses are almost comparable to Australian losses during the Third Battle of Ypres. And among them is Frank Roberts.
“Hamel would have been one of the very first actions for Frank Roberts, but he doesn’t survive the war. He is shot dead during the 2nd Division’s very successful attack at Mont St Quentin two months after Hamel.”
His name is on a large memorial cross commemorating the lives of the 10 members of the 21st Battalion who were killed, less than two months after the battle of Hamel, at Mont St Quentin on 1 September 1918.
The cross is on display in the First World War Gallery at the Memorial, and a diary belonging to Frank Roberts’ father documents his decades of grief over the loss of his son.
“I think the story of Frank Roberts illustrates a really interesting point about the last year of fighting on the Western Front for the Australians – victory comes at an immense cost.”
To mark the 100th anniversary of the battle of Hamel, visitors can hear how Sir John Monash meticulously planned the battle as part of the free Battle of Hamel virtual reality experience in the BAE Systems Theatre until 22 July 2018.
Watch Dr Aaron Pegram speaking about the significance of the battle in his online talk, Hamel: the Orchestrated Battle.
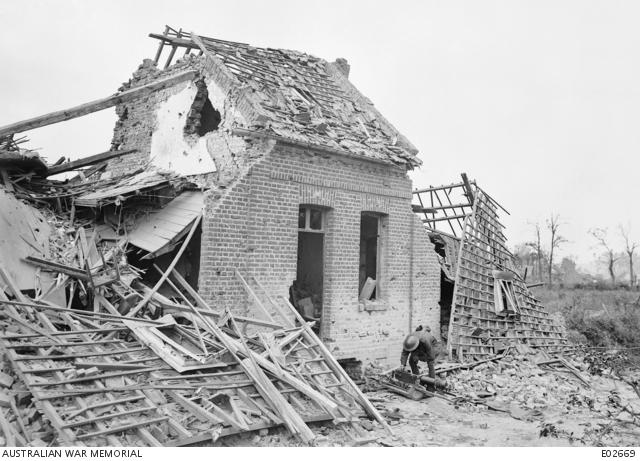
German machine gun captured at a house in Hamel.