Pillbox Fighting in the Ypres Salient
A key feature of the battlefield between Ypres and Passchendaele in 1917 was the pillbox. Along with the dreadful conditions and intense artillery bombardments, pillboxes forced a particularly grim situation upon the combatants that led to very bitter and costly fighting.
The Germans had begun a program of building concrete field fortifications in the latter stages of 1916 and early 1917, particularly in their new defensive position along the Hindenburg Line. With the increasing weight of British artillery superiority, these constructions offered the Germans a way for their front line troops to survive the massive bombardments, and to fight from them as well. By mid 1917, they had acquired the nickname ‘pillbox’ among the British and Commonwealth troops.
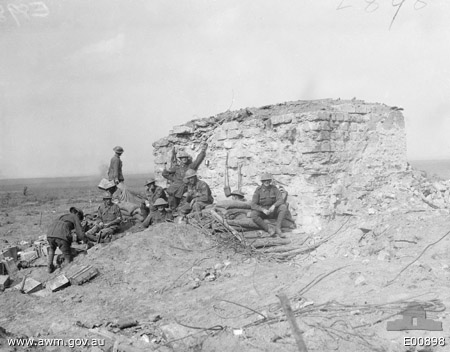
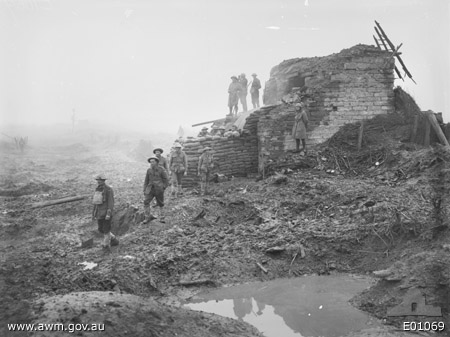
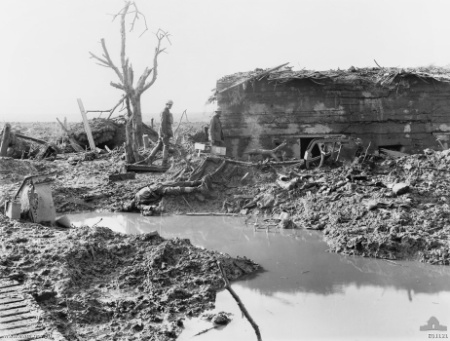
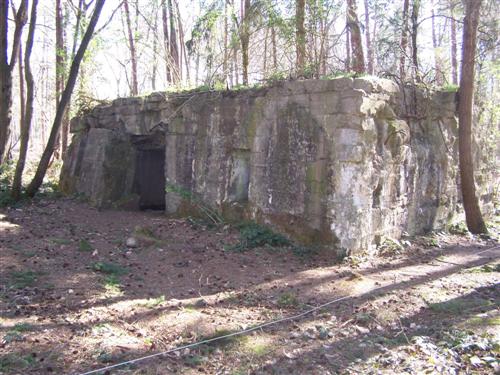
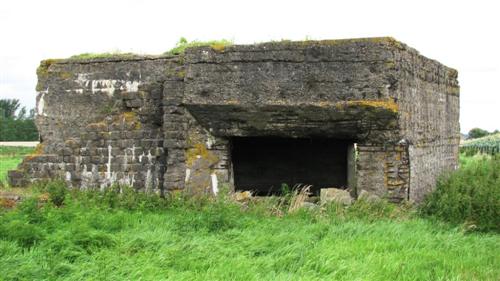
Constructed of concrete reinforced with steel, with walls and roofs several feet thick, they were able to withstand even direct hits from all but the heaviest calibre shells. The Germans called them Mannschafts Eisenbeton Unterstände (reinforced concrete shelters for troops) and as this name suggests, their primary role was to protect troops from artillery bombardments. Indeed many of them performed just that role, lacking firing ports (embrasures). Pillboxes in the proper meaning of the word, were those that both sheltered the troops and were designed to fight from as well. Low and squat, they were built in many different sizes, some designed to house only half a dozen men, while others, the size of a single-car garage, might house 10-20 men. Still others were even bigger (with some having two storeys) and might house up to 40. Often, debris were stacked on the roofs and against the wall to break up the pillbox’s silhouette. Another cunning design in the pillboxes was discovered later; the rear-facing walls were made much thinner and weaker, so if the Germans were forced to retreat from a pillbox, the new owners would find the wall facing the Germans was of little protection.
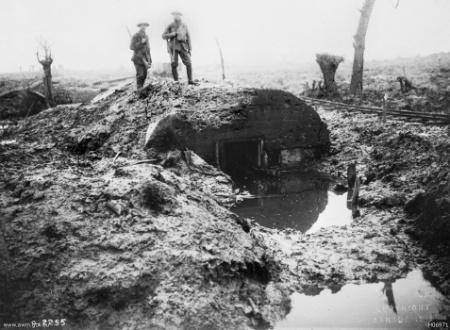
The terrain conditions in the Ypres salient, more than any other place, meant that pillboxes would play an important role there. With a high water table and high rainfall, trenches proved largely impractical. Coupled with the need for protection from the heavy artillery bombardments, pillboxes were the only practical solution for the German defenders.
As the ground rose gradually towards Passchendaele, the Germans built three main lines of defence to a depth of several miles, anchored on the ridges that rose gradually towards the village of Passchendaele. Hundreds of pillboxes and shelters were scattered throughout the area making it an exceptionally strong defensive system. Well behind these pillbox lines waited the German counterattack troops and the massed German artillery in support. The defences also incorporated fortified farmyards and in some cases pillboxes were built inside existing houses. The positions were cleverly sited to provide mutually supporting crossfire, backed up by separate concreted machine gun posts set in the open.

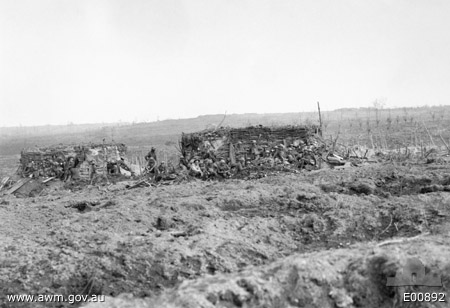
In the Ypres sector, many of the pillboxes were individually marked on detailed battle maps. Like any features on the battlefield they were given names to identify them. Pillboxes in the area had a variety of names such as Israel, Potsdam, Judah, Thames, Seine, Waterfields, Anzac, Helles, Kit, Kat, Hamburg and so on. The shelters and pillboxes were often used as first aid stations and as command and communication posts, the latter making them important tactical objectives.
The German method of front line defence was based upon the pillboxes. From here the occupants could survive the worst of the bombardment and be ready to fight for the front line posts as soon as the British and Commonwealth infantry advanced in its wake. Previous German defensive tactics were an ‘elastic’ style defence, where troops under heavy attack could fall back, while counterattacking forces held in reserve would then come forward in counterattack to win back the lost ground. With the pillbox, the defensive tactics changed, the front line German infantry being ordered to stay and hold their positions. Their presence would break up the formation of the attacking troops, and pin them down before the pillboxes so they lost touch with the advancing artillery barrage designed to protect them. All this rendered the attackers much more vulnerable to the coming German counterattack.
Of course for the British offensive at Ypres to succeed, the ground had to be taken, and that meant the pillboxes which proved mostly impervious to artillery, had to be conquered by the infantry. With the new German tactic of holding and fighting from the pillboxes, this inevitably meant these places became the scenes of numerous bitter struggles.
But despite their disadvantage the bravery and tenacity of the British and Commonwealth infantry eventually prevailed – albeit with tremendous loss of life. Despite being relatively safe from the shelling inside their shelters and pillboxes, the German defenders were usually stunned and demoralised by the relentless heavy shelling, and a well-timed, spirited and determined attack would often prevail.
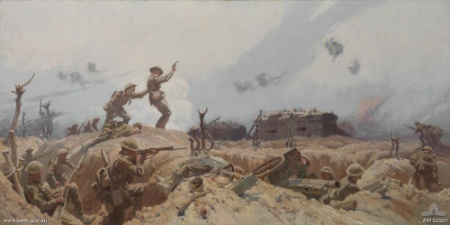
Moving forward in small groups in the immediate wake of a creeping barrage using fire and movement tactics, the attacking troops were able to work their way forward and put increasing pressure on the desperate German defenders. Small parties would work their way around the sides and the rear of pillboxes, clearing the supporting machine gun posts on the flanks with bombs and bayonet. Lewis gunners would spray the pillbox embrasures to try and suppress the firing coming from within, while Mills bombs and smoke bombs added to the pressure and confusion. Sometimes particularly daring individuals would make it right up to the pillbox itself and try to shove bombs through the embrasures. Once surrounded, most pillboxes were ultimately forced to surrender, although this often proved a dangerous moment to both attackers and defenders, and did not necessarily mean the fight was really over. The Official History relates a few of these grim incidents that the Australians experienced:
‘Here, as in so many pillbox fights, confusion, fatal for the garrison, occurred through the weaker spirits being ready to surrender while some brave men continued to fire. As the first German came out with his hands up, another behind fired between his legs and wounded a sergeant of the 20th [Battalion]. “Get out of the way, sergeant,” shouted a Lewis gunner, “ I’ll see to the bastards,” and firing three or four bursts into the entrance he killed or wounded most of the crowd inside’ (Bean, Vol IV, p 766).
‘Captain Moore, a beloved officer, now ran towards the pillbox, but was immediately shot by a German who, according to the reports afterwards made, had already surrendered. The Victorians at once killed this man and others, and only interposition by their officers stopped them from exterminating the whole garrison … Lieutenant-Colonel D. A. Luxton’s report says: “Captain F. L. Moore was mortally wounded by a man who had surrendered and who, when he saw an officer, dropped for the gun fired a burst, and put up his hands again.’ (Bean, Vol IV, p 771-772).
‘The mistakes commonly made in hot blood during this murderous pillbox fighting are illustrated by a terrible incident, which occurred that day and about that time, and which has been described by Lieutenant W. D. Joynt of the 8th Battalion himself afterwards a recipient of the Victoria Cross. He states that during this attack he came upon a wide circle of troops of his brigade surrounding a two-storied pillbox and firing at a loop hole in the upper story, from which shots were coming. One man, coolly standing close below and firing up at it fell back killed but the Germans in the lower chamber soon afterwards surrendered. The circle of Australians at once assumed easy attitudes, and the prisoners were coming out when a shot was fired, killing an Australian. The shot came from the upper story whose inmates knew nothing of the surrender of the men below; but the surrounding troops were much too heated to realise this. To them the deed appeared to he the vilest treachery, and they forthwith bayonetted the prisoners. One Victorian, about to bayonet a German, found that his own bayonet was not on his rifle. While the wretched prisoner implored him for mercy, be grimly fixed it and then bayonetted the man. The Germans in this case were entirely innocent, but such incidents are inevitable in the heat of battle, and any blame for them lies with those who make wars, not with those who fight them’ (Bean, Vol IV, p 771-772).
Hand in hand with these ferocious little battles and momentary absences of mercy, came many deeds of great courage and bravery:
‘… a series of gallant attacks on those in pillboxes then began. From the roof of one of these a machine-gun was firing. Sergeant McGee ran forward fifty yards and shot the crew with his revolver. The next blockhouse, “Hamburg," was charged by Lieutenant Meagher as of the mopping-up company, who had advanced in answer to a signal to fill a gap. He was killed, but Lieutenant Grant continued to lead, and the place was captured together with 25 prisoners and four machine-guns. The right was strengthened by Captain Dumaresq with part of the reserve company, and, [the 40th Bn] together with the neighbouring part of the 41st under Captain Redmond and Lieutenants Fraser and Price, it fought down pillbox after pillbox, practically every blockhouse being taken by some act of individual daring. After the objective was reached, a group of eight German officers or N.C.O's still fought on, in a pillbox ahead on the left, until killed.’ (Bean, Vol IV, p 865).
And so it is hardly surprising that numerous Victoria Crosses were won attacking pillboxes at Ypres throughout the British and Commonwealth armies. And not to forget, many other high decorations for bravery such as DSOs, MCs and DCMs were similarly awarded. Seven Australians in fact won the VC attacking pillboxes during 1917.
- Second Lieutenant Frederick Birks (Menin Road)
- Private Patrick Budgen (Polygon Wood)
- Captain Robert Grieve (Messines)
- Private Roy Inwood (Polygon Wood)
- Captain Clarence Jeffries (Passchendaele II)
- Sergeant Lewis McGee (Broodseinde)
- Lieutenant Rupert Moon (Bullecourt)
See article on Victoria Crosses of 1917.
Read more on pillbox fighting of the Australians at Messines: Official History, Vol IV, Ch 15, pp 623-627.

Sources
 Pillboxes on the Western Front: a guide to the design, construction and use of concrete pill boxes 1914-1918 / Peter Oldham, (1995), Pen & Sword Books.
 Official History of Australia in the War of 1914-1918: Volume IV – The Australian Imperial Force in France, 1917 / C. E. W. Bean (1933).