Fire eater of the 48th

Private Charles Stoerkel shortly after enlisting in 1914. The months of farm living are evident in his complexion and bearing. Adelaide, September 1914. B 46130/440 Courtesy State Library South Australia.
The face of the man gazing out of the portrait was weary and a far cry from the cherubic, tanned 19-year-old farmer who had enlisted at the Empire’s call in 1914. Four years of war– with three wounds and two gallantry decorations– had left their mark on his body, mind and his uniform. He was one of many in the Australian Imperial Force who had German heritage and had suffered because of it. Yet, despite the persecution, he had still enlisted to serve his country. The weary young man’s story began a world away; his bravery on and off the battlefield and his continued struggles to succeed in the aftermath of war are worthy of recounting.
Charles William Stoerkel was born in Edmonton, London, on 9 August 1895 to Jacob Stoerkel, a German émigré, and Sophia née Tanner. He was educated in Edmonton and briefly in Germany. In early 1913 he responded to an ad placed by the South Australian government, inviting boys aged 14 and over to become apprentices on South Australian farms – an attempt to address a shortage of agricultural labourers in the state. The promise of an “outdoor life with plenty of good food and splendid prospects” must have appealed to the 17-year-old working as a clerk in London. His application was accepted, and he was among the first group of 81 boys who left England on 15 May aboard SS Beltana.
It was a time of growing unrest in Europe. The relationship between Great Britain and Germany, deteriorating since the 1890s, soured further in 1906 with the launch of HMS Dreadnought, which triggered an arms race. Anti-German sentiment increased in Great Britain and the Stoerkel family likely experienced this firsthand. Charlie Stoerkel and his compatriots disembarked at Outer Harbour, Adelaide, six weeks later and were soon off to their new homes, Stoerkel eventually settling with the Hook family at Fair View farm, Orroroo.

Lieutenant Charles Stoerkel had been highly decorated by the end of the First World War with a Military Cross and Bar and a Mentioned in Despatches.
On 4 August 1914 the clouds of war finally loosed their storm over Europe. When Germany invaded France via Belgium, Britain declared war on Germany, and anti-German sentiment in Britain and its dominions reached fever pitch. Jacob and Sophia Stoerkel both had to register with British authorities under the Aliens’ Restriction Order. The records from the Prisoner of War Bureau were largely destroyed during the German bombing of London in 1940, so it is impossible to tell whether Jacob was interned. Sophia, despite her English birth, inherited her husband’s nationality and although not interned, was still subject to the restrictions placed upon ‘enemy aliens.’
Nowhere, it seems, was this anti-German sentiment felt more than in Australia. In South Australia, a state that had previously venerated its German heritage (over 100,000 Germans called South Australia home before the First World War), German families were turned upon, in many instances by former friends and neighbours. Jobs were lost, businesses boycotted and destroyed, and people of German extraction in positions of civic responsibility were forced to resign their posts.
Enlisting
However, this did not stop many young men of German heritage from enlisting in the Australian Imperial Force. When recruiting offices around the nation opened, they were swamped with men eager to serve, including in South Australia. Among those keen to ‘do his bit’ was Charlie Stoerkel, who travelled to Adelaide and joined the 16th Battalion at Morphettville on 11 September.
Recruited in South Australia and Western Australia, the 16th Battalion was concentrated at Broadmeadows Camp in Victoria, becoming part of Colonel John Monash’s 4th Infantry Brigade. By the time the 16th Battalion sailed from Melbourne aboard the transport ship Ceramic in late December, Stoerkel had become a signaller in his company’s signals section.
After disembarking in Egypt in February 1915, Stoerkel and his comrades had little time to acclimatise to the desert. With the failure of British and French naval power to force the Dardanelles in March, a land operation to capture the Ottoman forts on the European side of the Dardanelles Strait was decided on. The Australians and New Zealanders in Egypt were committed to this operation, and in early April the 4th Brigade sailed for the Greek island of Lemnos to prepare for the coming campaign.

Ellis Silas, Roll Call (1920, oil on canvas, 102x153 cm). Silas was a signaller on Gallipoli and witnessed the heartbreaking scenes he portrayed.
The 16th Battalion went ashore on Gallipoli late in the afternoon of 25 April and was sent straight to the front line. In his book An Eyewitness Account of Gallipoli, Signaller Ellis Silas of the 16th described the chaos of the days immediately after the landing. “Still fighting fiercely … now all signallers have been wiped out of A and B Companies except myself … The continual cry of ‘signaller!’ never seems to cease.” Stoerkel, a member of D Company’s signals section, found himself in a similar situation, remaining unharmed while his comrades fell dead and wounded around him.
On the evening of 2 May the 4th Brigade was thrown into an attack to secure the slopes of a hill known as Baby 700. The 16th Battalion led the attack out of Monash Gully between Pope’s and Quinn’s Posts. As they advanced over the aptly named Bloody Angle, they were met by withering Ottoman rifle and machine-gun fire. Hand-to-hand fighting continued throughout the night, but as dawn broke, the Australians were forced to withdraw. A total of 17 officers and 620 other ranks had started the attack, but fewer than half remained when the battalion returned to its starting positions; 8 officers and 330 other ranks were listed as killed, wounded, or missing. The battalion had become a shadow of the unit that had come ashore a week earlier. Stoerkel remained unscathed but Silas was evacuated from Gallipoli at the end of the month, his nerves gone, his war over.
General Sir Ian Hamilton visited Anzac on 11 June to discuss plans for a breakout offensive in August. During the visit Stoerkel was made a guardsman to the general. The August Offensive saw the 16th Battalion committed to the abortive attempt to capture Hill 971; by month’s end it had been reduced to the size of an understrength company. What was left of the 16th was sent to Lemnos in September to rest and reinforce, returning to Gallipoli on 2 November. With the end of the campaign in December, the 16th was among the last units to leave Gallipoli. Stoerkel was among the last men to leave in the early hours of 20 December.
After returning to Egypt between late December and January 1916, the AIF doubled in size with the 4th and 5th Infantry Divisions raised in Egypt. On 3 March Stoerkel was one of 354 men of the 16th Battalion who formed the nucleus of the 48th Battalion, led by the formidable Lieutenant Colonel Raymond Leane. Stoerkel was posted to the battalion’s signals section and promoted to corporal.

Officers of the 48th Battalion. Lt Charles Stoerkel is third from left, front row. c. November 1917 – March 1918.
France
The 48th Battalion arrived in France at the beginning of June, and after a brief stint in the Nursery Sector, was sent to the Somme. The battalion’s first major action was at Pozières, serving in the front line from 5 to 8 August and again from 13 to 15 August. There the men endured some of the heaviest bombardments experienced by Australian troops during the war. Stoerkel plied his trade amid the maelstrom of flame and white-hot metal, repairing communication lines whenever they were destroyed by artillery fire. On 13 August he was wounded in the neck by shrapnel but remained on duty. Initially recommended for a Distinguished Conduct Medal, he was mentioned in General Sir Douglas Haig’s despatches for “distinguished and gallant services [and] devotion to duty in the field”.
Stoerkel was promoted to Regimental Sergeant Major in mid-August after the previous RSM died from wounds. His promotions continued and in September he was commissioned as a second lieutenant by Lieutenant Colonel Raymond Leane – who was considered “a splendid judge of men … he chose his officers with nice distinction. He believed that the essentials for promotion to commissioned rank were fitness, physically and mentally, gameness and – youth.” Stoerkel clearly fit Leane’s criteria, and his hand-picked officers became known as Leane’s pups.
After his promotion to lieutenant in February 1917, he was sent as an instructor to the 12th Infantry Training Battalion at Codford, England. While he was there, the 48th Battalion suffered heavy casualties during the first battle of Bullecourt on 11 April. As a result, Stoerkel was back in France by the end of the month. The 48th Battalion next fought at Messines in June. Stoerkel, now a platoon commander in B Company led by Captain Derwas ‘Dave’ Cumming, provided a humorous distraction from the war. In his book Backs to the Wall, Lieutenant George Mitchell recalled the incident as officers of the 48th Battalion observed the second phase of the battle from Hill 63 on 7 June:
‘Oh! What a pretty little thing!’ exclaimed Lieutenant Charlie Stoerkel. ‘Eh?’ we grunted. Pretty was no expression to cope with that hell of flame and smoke in front. ‘That dear little bird.’ … Forty feet ahead, on the wire sat a little robin. We levelled our glasses. Perky and bright-eyed it sat, scarlet and brown. All the thunders of war were nothing to it. We watched and admired a long time.’
The men were soon brought back to reality and the 48th Battalion moved into the front line later that night. Around 5 am the following morning, Stoerkel led Sergeant Michael Patrick O’Brien (KIA 11 June) and Private George Thomas Wall into no man’s land to scout the German positions. Using shell holes and pre-dawn shadows as cover, they located an unoccupied trench, some 200 yards in front of the Australian positions, and reported their discovery to Cumming. Following the debacle at Bullecourt, B Company had been reduced to two platoons, but Cumming immediately sent one platoon to occupy the position.
Stoerkel led his scouts forward again, this time using a line of willow trees as cover, and located a second undefended trench. Stoerkel retrieved the platoon from the previous trench and as he led them forward, they came under German machine-gun fire and suffered several casualties.

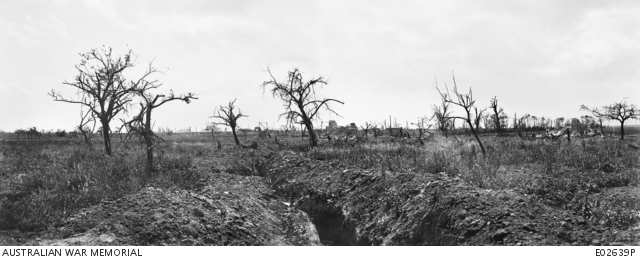
Owl trench was the scene of much heavy fighting at Messines in June 1917. Photograph, 27 November 1917.
When the firing eased, Stoerkel, O’Brien and Wall advanced in broad daylight and located a third unoccupied trench, which was then secured. Stoerkel chanced his arm once more, but Lady Luck deserted him and he was shot in the head by a sniper. The single round entered his head forward of his left ear, fracturing his upper maxilla and destroying several teeth while exiting through his mouth. O’Brien and Wall carried Stoerkel back, and despite the severity of his wound, he reported to Cumming before being carried to an aid post. He was evacuated to England, where he underwent surgery to his palate, gums and face. While in England he was awarded a Military Cross for his actions at Messines. In September, just after his 22nd birthday, he was declared fit; and after receiving a dental plate, he returned to France. He re-joined the 48th Battalion and was back in action the following month when the battalion suffered heavily in the failed first battle of Passchendaele.
After a brief leave to England in January 1918, Stoerkel was with his battalion in France when the Germans launched their Spring Offensive in March, driving the British and their allies back over ground won at such cost in previous years. With the Germans threatening the vital Amiens railway junction, the 48th Battalion took part in blunting the German offensive in two defensive battles for Dernancourt in late March and early April. Though Stoerkel’s efforts in these battles are not recorded, he had by this stage of the war forged a reputation for being at the sharp end of any action.
The 48th Battalion spent Anzac Day waiting for orders to assist in recapturing Villers-Bretonneux, taken by the Germans the day before; but the battalion stood down after hearing the Australian 13th and 15th Brigades had recaptured the town in the early hours of Anzac Day.
Monument Wood
Although the Germans had been ejected from Villers-Bretonneux, they still held a formidable defensive line. Part of that line extended into Monument Wood, situated on a dominant rise south of the town. A farmhouse within the wood provided the German defenders with an excellent overview of their surrounds, including the Australian positions. The wood was heavily wired and protected by numerous well-sited machine-guns, making the capture of this position a daunting prospect.
The 12th Brigade returned to the front line at Monument Wood in early May. Now acting Brigadier General commanding the 12th Brigade, Raymond Leane tasked his old battalion with ejecting the Germans from the wood. A, B and C companies would make the main assault with D Company in reserve. Stoerkel was given command of the mopping up party made up of three officers and 47 men from D Company. Leane gave Stoerkel the task of clearing the farmhouse and later recalled Stoerkel asking what sort of souvenir he would like. The Bull, asking if Stoerkel could reach his objective received a pointed “Oh, yes, I’ll get there all right”; and so reassured, Leane asked for a watch.
The attack was preceded by an artillery bombardment that Lieutenant Mitchell described somewhat bitterly in his book: “Six eighteen pounders fired for two minutes, then stopped … We were astounded at the poorness of the barrage. Just enough to wake Fritz up properly.” Mitchell was not wrong. As the Australian attack began, they were illuminated by flares and came under heavy German machine-gun fire.
The German wire remained uncut and the Australian attack stalled. However, some members of B and C Companies did manage to break through the wire and make their way into the woods. Stoerkel wasted no time in leading his men across no man’s land, and after avoiding several German outposts, led his party into the wood. Stoerkel and his men then assaulted the farmhouse and its outbuildings, killing several Germans and capturing six more. The prisoners were sent back to the Australian lines, escorted by a wounded Australian.
After posting Mills bombs through the farmhouse door, Stoerkel’s men charged inside, killing three Germans they encountered on entry. Other German soldiers fled and made their way into the wood. A cellar was found under the farmhouse and Mills bombs were rolled down the stairs. One German officer was killed and several wounded. The remaining Germans surrendered and after being disarmed, were sent back to the Australian lines under guard. Stoerkel then placed his men in defensive positions in and around the farmhouse.
The Germans launched a counteratack in overwhelming numbers and the Australians in Monument Wood were forced to withdraw. Faced with being cut off and surrounded, Stoerkel ordered a fighting withdrawal. The men moved in bounds, covered by well-sited Lewis gun teams who provided fire between their own moves. A number of Stoerkel’s men were killed and 15 were taken prisoner after becoming surrounded. It was a much reduced ‘mopping up’ party that returned to the Australian front line.
Stoerkel’s men captured 21 Germans, who turned out to be the headquarters of the 20th Jäger Battalion. They were the only prisoners taken during the attack by the Australians. When Lieutenant Mitchell mentioned this incident in his book, he referred to Stoerkel as the “battalion fire eater”. Leane also later recalled Stoerkel presenting him with a German watch the night after the raid, fulfilling his promise. For his actions at Monument Wood, Stoerkel was awarded a Bar to his Military Cross.
Monument Wood cost the 48th Battalion 150 casualties. Among the dead was Captain Dave Cumming, a battalion original who was killed rushing a machine-gun post. Monument Wood was finally captured by the 26th Battalion in July.
On 8 August the British and their allies launched what would become known as the Hundred Days’ Offensive. The 48th Battalion began its advance towards Proyart at 8 am, capturing its first objective against light opposition soon after. As the advance resumed around mid-morning, the battalion came under machine-gun and artillery fire. Stoerkel, now battalion signals officer, and his signallers came under German artillery fire. One man was mortally wounded and Stoerkel received a shrapnel wound in the stomach. Although the shrapnel did not pierce his abdominal wall, he was evacuated to England to recover.
Stoerkel returned to the 48th Battalion on 18 September and was detached just days later, along with several of his comrades, to the American 107th Regiment, 27th Division, to assist them in their attack on the Hindenburg Line. Though the overall attack was successful, the Americans suffered heavy casualties. Stoerkel returned to the 48th Battalion in early October and spent the last weeks of the war well away from the front line.

Four years of campaigning were writ large upon the face and uniform of Lieutenant Charles Stoerkel MC and Bar, MiD. England, c. 1918.
Post-war
Stoerkel returned to England in January 1919 and in February he married Catherine Valentine in St Mary’s Church, Edmonton, with both families in attendance. He took leave from the AIF to train as a cinema operator. Such was his skill, he was offered a job in one of London’s theatres at the end of his course. Stoerkel chose to return to South Australia; and on 8 August, he and Catherine, now pregnant with their first child, departed for Australia aboard SS Katoomba. The Stoerkels welcomed their daughter Gwendoline in Adelaide on 30 November.
As in England, anti-German sentiment and rules governing employment of ‘enemy aliens’ continued in Australia post-war. His job on the farm at Orroroo was not offered back to him, although the Hook family did ask him, through the repatriation department, to visit. It is unknown if he ever took up their offer.
Lieutenant Charles Stoerkel MC and Bar, MiD, was discharged from the AIF at Keswick in early December, but though the war was over, peace eluded him. Despite his honourable and decorated service, his German heritage continued to be an issue. On 17 January 1920 he changed his surname by deed poll to Tanner, his mother’s maiden name.
Stoerkel (Tanner) struggled to settle into civilian work. He briefly worked on a soldier co-op scheme along the River Murray but was back in Adelaide by the end of 1920. He next ran a dry-cleaning business in Adelaide before an unsuccessful attempt to farm a soldier settlement block. One of the few bright lights during this time was the birth of a second daughter, Chrissie, in April 1922.
In 1924 Stoerkel (Tanner) moved his family to Sydney, settling in Maroubra. He held a variety of jobs, mainly in the dry cleaning and laundromat industries, but he continued to battle mental and physical health issues and the Repatriation Department. He was rocked by the death of his wife Catherine, who was only 53, in 1945. Another personal tragedy occurred in 1966 with the death of his eldest daughter Gwendoline, aged 46. In 1967 Stoerkel (Tanner), aged 73, was declared totally and permanently incapacitated due to his poor health, and for a time he was cared for by Chrissie. He was admitted to Maroubra Junction Nursing Home in declining health in 1978, when he appears to have become estranged from Chrissie. Charles Stoerkel (Tanner) died alone, aged 90, on 7 November 1985. His remains were cremated and interred in the Eastern Suburbs Memorial Park, Matraville.
You can purchase your copy of Wartime 100 here: