The Big Guns
Artillery was the most dominant of all weapons in the First World War; it set the nature and conduct of battles, transformed the landscape, and caused the most casualties. In the fighting in France and Belgium, Australian gunners were employed in every main area of British operations.
The 9.2-inch Breech-Loading (BL) Howitzer was the largest artillery piece used by Australians in the war, and remains the largest used in land battle in the history of the Royal Regiment of Australian Artillery. These guns, the composition of their crews, and many of the areas of their operations, were different from the rest of the Australian Imperial Force (AIF).

Will Longstaff, Australian 9.2-inch howitzer 1919, oil on canvas, 92 x 153 cm,
Only one Australian battery – the 55th Heavy Artillery Battery – was equipped with the 9.2-inch (233-millimetre) howitzers. At first, the battery had just four guns, and this was later expanded to six. The battery, and the 54th Heavy Artillery Battery, which had 8-inch (203-millimetre) howitzers, on wheels, were placed together as the Australian Heavy Artillery Group (HAG). These two siege batteries, and their headquarters, moved from Britain to France in March 1916 and became the first Australian units to go into battle on the Western Front.
Unlike other formations of the AIF, which were created from civilian volunteers, the heavy batteries had been formed mostly from permanent artillerymen of the Royal Australian Garrison Artillery, with some reinforcements from the militia; the same regulars and citizens’ force soldiers who had been manning the forts guarding Australia’s ports and coastline. Early in the war, after it was decided that there was little direct threat to the coastal cities, the brigade was drawn together in Melbourne from the different states’ drafts, and sailed for overseas service in July 1915. On arrival in Britain the unit, with its two batteries, was numbered the 36th (Australian) HAG.
The 36th HAG was placed under the command of Lieutenant Colonel Walter “ Wacky” Coxen. He was a soldier who was impressive in both mind and manner. Before the end of the war he would become the senior artillery commander of the Australian Corps. Major John Hurst was the first to command the 9.2-inch battery. His early career also followed in some of Coxen’s footsteps. He accompanied the heavy battery overseas, then, in July 1916, was appointed to command the 22nd Australian Field Artillery Brigade. He returned to the heavy artillery in January 1917, taking over as commanding officer following Coxen’s promotion, and remained there until the end of the war.
In England the 55th Battery took delivery of its brand-new 9.2-inch howitzers in December 1915. They were modern monsters, and the gunners spent a further two months training on them at Taunton in Somerset. The guns, which had only recently entered service, met a particular need on the Western Front. Firing from their stable base, with a high angle, a low muzzle velocity and slow rate of fire, the guns could place heavy shells on enemy positions accurately over a long range. It was possible to fire two rounds within one minute, although this rate could not be sustained.
The 9.2-inch howitzer, which had a working crew of 14 men, threw a 132- kilogram projectile almost 10 kilometres. The howitzer was fired from a fixed and stable position on a beam platform set into the ground. Moving the gun to new locations was a time-consuming and heavy task, requiring the gun and mounting to be broken down into three main loads. The all-up weight was 12 tonnes.
There were better ways of moving the howitzers from place to place than using horse-teams. Instead, a 100-horsepower Holt caterpillar tractor hauled the transporting wagon, with two attached loads bearing sections of the carriage body. The ungainly train moved at walking pace over the cobbled roads in Flanders and France, causing heavy wear on the metal tracks, making them slippery in the frost and wet, and creating constant vibration that left drivers exhausted even over short distances.
Establishing a position for firing was a slow process. To lay the two-beam platform and assemble and prepare the gun needed a detachment of 25 men. In muddy ground it could take two days to set the platform and a further 12 hours to deploy the gun. An earth box containing about 10 tonnes of ballast was attached to the front of the gun to keep it balanced when firing.
When fired, the howitzer gave a mighty blast. In France during 1916 an Australian chaplain came too close to one gun. “I thought the end of the world had come, and I was lifted violently off my feet and thrown against the ground. I had walked unwittingly … right in the angle of blast,” he recalled. Despite this, gunners did not wear ear protection and usually ended up suffering various degrees of deafness.

Australian gunners load a shell into a 9.2-inch howitzer. From this position guns fired in support of Australian troops at Pozières in July 1916.
The heavy artillery gunners did not see a lot of their countrymen. The two batteries were Army Troops and could be employed anywhere they were required along the front. At different times they could be under British, French, Australian or Canadian command, and sometimes also supported New Zealand, South African or Belgian troops. The batteries and their headquarters were not always together; they were mostly associated with, and developed an affinity with, British units of the Royal Artillery.
The separation of the heavy gunners from the rest of the AIF was evident in other ways too. Having been largely drawn from the permanent army, members of the brigade were allowed to continue to wear the “RAA” badges instead of the general service Australian “Rising Sun” that was common throughout all other units of the AIF.
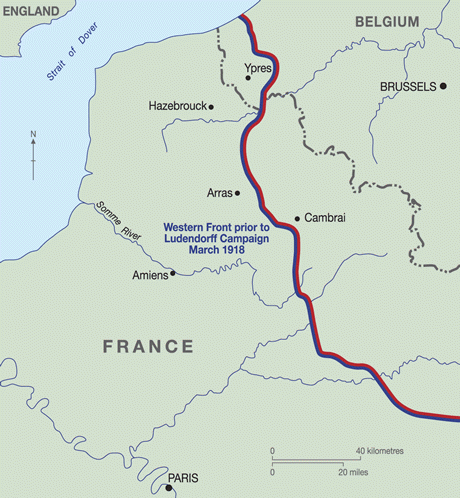
The 9.2-inch howitzer battery spent less time in the Somme region than most of the Australian divisions. Its main sphere of operations was north of Arras, around Vimy, sometimes supporting the Canadians, and in Flanders around Ypres. The guns did go to the Somme in mid-1916 to support the British offensive, and were there in July, when they fired in support of the Australians’ attack on Pozières.
During their spell near Arras in 1917, the 9.2s assisted the Canadians in their famous capture of Vimy Ridge. Then the guns moved north into Flanders in time to fire for the battle of Messines in June. This was followed by the third battle of Ypres, when all five Australian infantry divisions took part in the fighting, and again the guns were in the general area of AIF operations.
Mud was a big problem, particularly in Flanders. It was hard to get a firm base in the sodden ground. Guns became so bogged that they could not be moved, and the supply of ammunition was difficult. An example was when the Australians were eventually relieved after the Ypres fighting in late 1917 and their howitzers had to be left behind. They were handed over to the Canadians while the Australians took over some of their guns in a quieter area – “a home away from home” – before moving by night to Villers-Plouich in preparation for the forthcoming Cambrai battle.

A gun of the Australian 9.2-inch battery in action at Voormezeele, Belgium, in September 1917.
Working the big howitzers was constant and heavy work. It was vital that the guns, or their flash, not be seen by the enemy. They were generally set up, under cover well behind the front line, to fire over long range; and they were usually fairly safe. One of the Australian officers wrote: “Thank God I am a gunner and not an unfortunate infantryman; they do have a thin time.” However, when the guns were set well forward, or German heavy artillery got their range, the immobile heavy howitzers became very vulnerable.
One of the worst moments was on 4 October 1917, in the opening of the Broodseinde battle beyond Ypres, when the howitzers suddenly came under heavy shelling. The battery commander wrote: “ We lost about 15 killed and 30 wounded. Had a bit of a job getting the killed and wounded away and getting the guns back into action as [they] had been a bit knocked. Most of the lads did great work.” Many of the wounded had to be carried out on duckboards. Lieutenant Percy Dobson, who was there, commented sadly: “The battery lost some good men that day.”
In a three-day period the battery lost a quarter of its gun-line strength, killed or wounded.
An even greater danger was a sudden enemy breakthrough, making it impossible to extract the heavy howitzers in time. This happened on 30 November 1917 when the 9.2-inch battery was located just south-west of Cambrai. The howitzers had been brought up a few weeks earlier and emplaced at night just 800 metres behind the front line, ready to be a part of a great British attack about to begin. Following a successful battle, in which tanks played a leading role, the Germans counterattacked, placing the guns at risk. The Germans retook a lot of ground. Although they were finally held, and the line stabilised, it was a disaster for some of the British artillery, with many of their guns overrun. Even the heavies further back were exposed. In the late morning, with the enemy advancing, the Australians had received the message: “Prepare to destroy your guns and evacuate.” By early afternoon the battery was under fire.

The Memorial’s 9.2-inch howitzer. It is probable that this particular howitzer was used in action by the 55th Siege Battery in France in 1917. It is now on display in ANZAC Hall.
The situation worsened. The Germans came on and there was no time to destroy the howitzers, so attempts were made to disable them. The breech-blocks were removed and buried. In desperation, fires were set under each gun, using the ammunition bag charges. An officer recalled: “As the Huns seemed to be north, east, and south, we decided on [withdrawal] due west. Nobody knew what was happening”. Finally, the Germans were stopped before they got the guns. The gunners went back, and the howitzers, now burnt and damaged, were hauled away to safety and for repair. But it had been an inglorious moment.
Part of the problem throughout this ordeal was caused by the absence of the battery commander, Major Arthur Bates, who had been away for several days. A university-educated regular soldier, he had already been mentioned-in-despatches for “distinguished and gallant conduct”, and had been appointed to command the battery several weeks earlier. But this day ruined his career. Dismissed from the service for being absent without permission and for failing to return during the salvage operations, he went home in disgrace in June 1918. Command of the battery passed to Major George McDonald; when he was mortally wounded in March 1918, Major Gordon Manchester took over, commanding the battery until the war’s end. Manchester had not joined the unit until October 1917, having been held back in Australia in charge of the Thursday Island defences.
The technical aspects of artillery work advanced rapidly as the war progressed. Guns of different sizes fired a range of shells, including high-explosive (HE), shrapnel, gas, and smoke. The 9.2s used HE almost exclusively. The effectiveness of these shells was increased by the new No. 106 Percussion Fuze, which was first widely adopted by the heavy batteries from 1917. This was an instantaneous fuze that detonated the shell on top of the ground before it had penetrated. Artillery work had become a precise science, although the heavy gunners still simply described their main tasks as divided between “counter-blasters” engaging enemy batteries, and “trench-punching”.
In December 1917 there were changes for the Australian heavy batteries, now back in Flanders resting and refitting following the Cambrai battle. A new permanent brigade structure was announced. Batteries of 6-inch howitzers and 60-pounders were added, and, with the two existing batteries, they were now named the 36th Heavy Artillery Brigade; the 8-inch and 9.2-inch batteries becoming the 1st and 2nd Siege Batteries. The brigade was posted to the Australian Corps and it looked like the heavy gunners might see out their service alongside the AIF divisions. However, nothing came of this as most of the Australian divisions were quickly sent back to the Somme to try to stop the German advance there in March 1918, and to later be a part of the local counter-offensive. The heavy guns could not accompany them. When the Australian Corps eventually took part in the 1918 advances they were supported by 9.2-inch howitzers from British units, while the Australian battery continued its work in the north.
The German offensive of early 1918 was not restricted to the Somme. There was also pressure on the Ypres front, where the enemy made substantial gains. In early April 1918, some of the Australian 9.2-inch howitzers were overrun by the Germans near Ploegsteert Wood, where they had spent several weeks. In attempting to withdraw two guns, the gunners were defeated by the mud and slush and found that some tractors could not even pull themselves out. One 9.2-inch carriage was only hauled out by using three tractors, but little else could be done. The brigade was withdrawn towards St Omer, and was later re-equipped and back in action around Meteren.
Only the 1st Australian Division stayed on in Flanders, not rejoining the rest of the Australian Corps on the Somme until August 1918. There were some occasions when the Australian heavy howitzers fired in support of the division’s operations. This work in the Strazeele-Hazebrouck sector, during May and June, was mentioned in the award of the Distinguished Service Order to Lieutenant Colonel Hurst. It was the last occasion that the guns were involved in assisting the Australian infantry. The big howitzers remained a part of the overall British firepower in the Ypres area, supporting operations there until the end of the war.
The Australian Heavy Artillery Brigade was a very small part of the AIF’s contribution to the war on the Western Front. Still, it had done good work, having been heavily committed in action for a total of 860 days, during which it suffered 71 fatal casualties and had almost 300 wounded.
Some of the officers, being career soldiers, felt that their brigade’s isolation from the main body of the AIF had reduced their chances for promotion. Despite this, many of them had been recognised and Coxen had risen to the highest level in the artillery – by 1918 he was the AIF’s “boss gunner”. There were little more than a dozen original officers who had come away in 1915, and from them Major George McDonald had died of wounds, and Major Charles Morris, who was 54, was returned to Australia suffering severe shell-shock, while some transferred to other units.

John Longstaff, Brigadier General Walter Coxen, 1919, oil on canvas, 76.4 x 63.4 cm
There were interesting characters in the ranks too; none more than Gunner Walter Schwarz. This 19-year-old felt that he would not be allowed to go to the front with the brigade because of his German name, and so he deserted while in England. But, determined to serve, he enlisted in the British army under another name. He went on to be commissioned, promoted to captain, was twice awarded the Military Cross for bravery, and received his division’s card of honour four times, until he was severely wounded, resulting in the loss of one leg. Before returning to Australia he confessed to being a deserter, and received a pardon from the King in 1921.
The Australian War Memorial displays a 9.2-inch howitzer in ANZAC Hall. It is a reminder of the work of this unique artillery battery and the many stories surrounding it. The big guns sometimes served with distinction in the same area as the AIF divisions, while at other important times, such as the battle for Vimy Ridge and at Cambrai, they provided Australian representation where there was little other involvement.