A difficult landing

"The idea seemed to be we were to hold high ground above Fisherman’s Hut and numerous landings would distract Turks."
Major General William Bridges, commanding the 1st Division, 11 April 1915
The landing on Gallipoli on 25 April 1915 did not go to plan. The first boats, carrying the covering force, became bunched and landed about a mile north of the designated beaches. The main force landed on too narrow a front and became intermixed, making it difficult for the troops to regroup. The troops had to scale treacherously steep ground with little understanding of the terrain.
A few Australians almost reached their objectives for that first day but were forced back. This failure bogged the operation down for the rest of the campaign. Evacuation was considered on 25 April, but it was decided it was not feasible. Sir Ian Hamilton issued the order to hold on: “You have got through the difficult business, now you dig, dig, dig, until you are safe.”

Charles Bean landed at Anzac Cove at 9.20 am on 25 April and took this photograph of the 1st Divisional headquarters staff coming ashore. At this time there was fighting on the second ridge, and these men were able to wade ashore in relative peace. G00903
Not to plan
Birdwood’s diary entry on 25 April supports that he had intended to land further south: “Boats missed their bearings in dark inclined about 2 [miles, or just over 3 kilometres] to [the] North getting us under the very difficult country there.”
Lucky escape
John Croft's pocketbook was pierced by a Turkish bullet during the landing on 25 April 1915.
"It was a great fight while we were getting out of the boats and a good many got shot but a bayonet charge soon shifted the Turks and things got pretty lively. Towards 12 noon they were knocking us over pretty often and I stopped a bullet in my pocket book after it had been through my arm."
At the landing
"2 men to every oar we rowed like ---- for the shore"
John Adams served on Gallipoli for the entire campaign and was evacuated on 20 December 1915.
The riddles of Anzac
Failure to exploit the Gallipoli landing raised questions about its organisation and planning. Had they landed at the wrong place? What was the strength of the Turkish opposition? Did the enemy have machine-guns? Such questions have been debated by veterans and historians ever since.
In an attempt to solve the “riddles of Anzac”, Charles Bean visited the peninsula in 1919. Numerous entries in his diaries and notebooks also record interviews with Australian Imperial Force officers about the landing. This diary entry discusses the positioning of the tows at the landing.
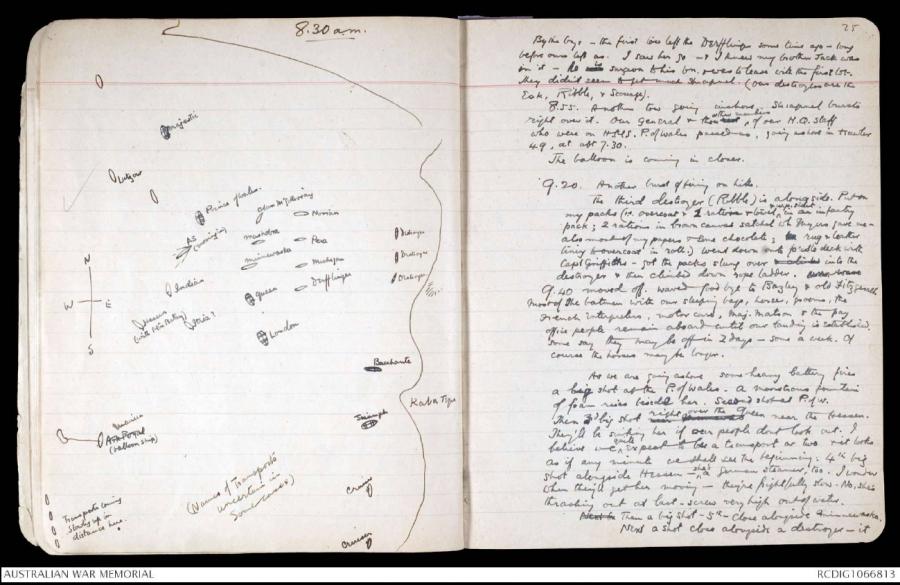
Page from Bean's diary showing the landing boats. AWM38, 3DRL606/5/1
Gallipoli terrain
In the official history, Charles Bean wrote of the rough country of the Gallipoli peninsula. He described confusing slopes, perpendicular crags, and gorse-like scrub.
The growth was stubborn, and, in the steep gravelly waterways with which the hillside was scored, it was as much as a strong man could do to fight his way through it, to say nothing of carrying his heavy kit and rifle.
By the end of the first day, the Turkish defenders held the high ground. The rugged nature of the terrain, with its many steep ridges, was a major cause of the Anzacs’ failure on 25 April.
Original map used at the landing

Relief map of Gallipoli scale 1:40 000 : sheet 2 belonging to Noel Medway Loutit, who landed with the 10th Battalion at Gallipoli 25 April 1915. G7432G1S65V2F
Annotated by Lieutenant Noel Loutit of the 10th Battalion, this map notes Turkish defences observed by aerial reconnaissance. The standard-issue 1:40,000 scale maps are often considered part of the reason for the failure of the landing as they misrepresented important aspects of the terrain.
Loutit was one of few Australians who saw the straits of the Dardanelles during the campaign. Many of the men, like Loutit, dashed up Plugge’s Plateau, thinking that they could easily make their way to Baby 700. But they were stopped by a thin razorback the men could not walk along; instead, they had to make their way through the scrub, down into Shrapnel Valley and then up again to Russell’s Top, taking over an hour to go what appeared to be a short distance on the maps.


The Sphinx was an easily recognisable feature of the terrain at Anzac. Its shape and prominence reminded men of the famous ancient monument they had seen in Egypt.

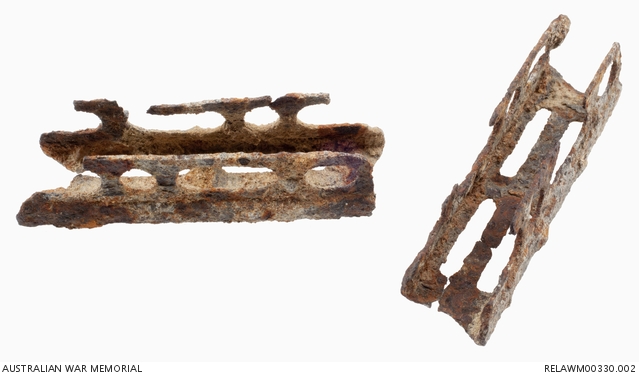
The furthest point
The Anzacs got to Baby 700, Scrubby Knoll and Pine Ridge on the first day but were forced to retire. They were never to reach these positions again for the rest of the campaign. Bean found and collected this New Zealand shoulder strap, cartridge clip and water bottle in this area during the Australian Historical Mission to Gallipoli in 1919.